I don’t normally do challenge runs in games. Up until now, the most difficult things I’ve done in solo video games have been completing Thief Gold on Expert Difficulty, a No Alerts/No Kills run of Metal Gear Solid 3: Snake Eater, and a No Alerts run of Dishonored. All of these are stealth games, which are my usual wheelhouse, and my penchant for skulking around drove my desire to play them with further restrictions that encouraged the core stealth gameplay in each title. It’s ironic, then, that the only From Software title in the wake of Demon’s Souls which I haven’t played is Sekiro: Shadows Die Twice; you know, the one which has more focused stealth mechanics? While I’ve played all the Souls-era Fromsoft games at least once, and have done multiple playthroughs of about half of them (particularly Bloodborne), I never felt compelled to do something like a “Soul Level 1 Challenge.” I enjoy these games a lot, but that enjoyment is centered around the immersive atmosphere and moment-to-moment gameplay they provide. They never sparked that drive to surmount any kind of challenge run or restrictive playstyle.
Until I played Elden Ring.
(Spoiler Warning: this article mentions every mandatory boss in Elden Ring.)
As I came to grips with all the intriguing changes brought to the Souls formula, what caught my attention most was the plethora of offensive items, many of which could be crafted. Much of my early game experience involved liberal use of items like the Poisonbone Darts, Bone Darts, and Throwing Daggers. Their use case was so versatile that even hours after I had replaced them in my kit with bestial magic, I still found myself thinking about how valuable they’d be for this situation or against that enemy. As I acquired special items like Ritual Pots, Perfume Bottles, the Ancestral Infant’s Head, and more, I couldn’t help but wonder if it would be possible to complete the entire game solely using items.
My first playthrough had a small amount of bestial incantations, but I mostly played as a dual greatsword-wielding berserker knight. This was a fun playstyle, albeit with some drawbacks. I had heard from several friends that more heavy investment in magic and bleed builds made short work of several Elden Ring encounters that I struggled with on my initial character. While I was interested in diving into those kinds of builds in later playthroughs, all the unique and compelling items in the game pushed me toward a singular desire to try something completely out of left field.
This led to an idea for an “Items Only” Elden Ring playthrough and what I would eventually refer to as the “Chemist Run” to my friends. Why “Chemist”? It’s a nod to the job in Final Fantasy Tactics which revolves around using items in battle. Chemists in that game aren’t terribly great in combat, and they work more as early-game healers and support units, but items have been a ubiquitous aspect of RPGs since time immemorial, and the Chemist was created to focus around this one facet. In a typical RPG any character or unit can use items, but in Final Fantasy Tactics, only units who have had experience as the Chemist job can employ the Use Items command. Combine this with the fact that several of the Perfumer enemies found in Elden Ring both wear attire reminiscent of the Final Fantasy Tactics aesthetic, as well as having a function in the world as chemists who adapted their skills into a means of fighting, and the name stuck.
Before starting the run proper, I compiled a list of items that would need to be collected. In order to craft anything in Elden Ring, you have to acquire the respective Cookbook which adds its recipes to the crafting menu. You get a few starter recipes when you first purchase the Crafting Kit from the merchant Kalé, who is likely one of the first NPCs a player will meet, but everything else requires a specific book. I marked out which books were available in each of the regions of the Lands Between, whether or not they’d be of use to me for the Chemist Run, and whether or not they’d need to be purchased. I did the same for the Cracked Pots, Ritual Pots, and Perfume Bottles. These three container items act as reusable components of certain recipes. A Fire Pot works like the old Firebombs in previous Souls games – it’s a fiery grenade you throw, but it requires a Mushroom, a Smoldering Butterfly, and a Cracked Pot to craft. When you throw the fire pot, the cracked pot is returned to you, allowing the crafting of another Cracked Pot item. Ritual Pots and Perfume Bottles work on the same principle, so it’s important to acquire as many of these as possible to increase one’s maximum crafting capacity for said items.
I also established specific rules for the Chemist Run playthrough:
– Quick Item & Pouch Slots Only
– No Weapons
– No Ashes of War
– No Spells
– Spirit Ashes at player’s discretion
This ruleset basically meant that if something couldn’t be assigned to a Quick Item Slot or a Pouch Slot, it couldn’t be used. Since armaments like weapons, shields, staves, and seals use the Armament Slots, they are forbidden. This also means weapon-based Ashes of War and Spells cannot be used either – you need to have a weapon equipped to use the former, and a staff or seal equipped to use the latter. Spirit Ashes are summons players can use for certain encounters, overworld areas, and boss fights. Since Spirit Ashes are used like an item (they can be assigned to Quick Item or Pouch Slots), they must be sought after, and they must be upgraded over the course of a playthrough with a specific resource, I felt that they were perfectly acceptable inclusions to the Chemist Run concept. There are many powerful Spirit Ashes in the game, but nearly all of them are locked behind optional content, and optional content bleeds into resources in a run like this, which strikes a powerful balance of fairness in my eyes.
With all that cataloged and compiled, I set out on creating a new character. While I don’t typically play these games in New Game+ to begin with, I didn’t think it would be a worthwhile challenge if I simply took my first character and began the Chemist Run there. Having access to an entire playthrough’s worth of crafting materials and talismans would defeat the point, especially since I would have used weapons to acquire them in the first place. I also was concerned about the scaling health of enemies typically found in NG+ cycles: their health pools would increase, but I’d still have a limited amount of items for each boss attempt.
I initially wanted a class with high base Dexterity and Intelligence, as many of the consumable items scale their damage with these two attributes, so I opted for the Prisoner class. Upon further examination later on, I’d realize that Strength and Dexterity were the more beneficial attributes for the items I’d rely on, and I eventually opted for what’s called a Quality build: 50 Strength & 50 Dexterity, with 25 Intelligence for the small boost in magical item damage. The choice in starting class doesn’t make a huge difference in a challenge run like this, but since the option to reallocate one’s attributes requires defeating a particular pair of bosses, and I didn’t yet know if I could see this challenge through to the end, getting a jumpstart on the particular build I wanted felt necessary.
Your starting keepsake item is a bit more interesting in a Chemist Run. Do not be like me and realize hours into your playthrough that you absentmindedly picked the Golden Seed item in lieu of the Cracked Pots. Remember those? You can actually start with three of them first thing, and in the one run where I’d have a decent excuse to pick them, I didn’t. It’s not that big of a deal and picking these simply takes them from the game world and puts them into your inventory at the start. You can only ever have 20 Cracked Pots, and this just gives you 3 for free. It’s still worth picking them up, but if you find value in another keepsake, or you neglect to pick them like I did, then that’s fine.

With my starting class selected, and my character modeled and named after one of the greatest fictional demolitionist experts who isn’t in Team Fortress 2, I began the run and made my way to Kalé, that merchant I mentioned before. I sold him my starting sword, staff, and shield, and was immediately struck with the first revelation I had about how this run was going to go: most armaments sell for a measly 100 runes. Even the fabled “legendary armaments” only sell for a few hundred more. While I wasn’t planning on using any weapons, selling them for runes was something I thought I could rely on to supplement my leveling and purchasing in the early game. I wasn’t wrong, but just to illustrate what a raw deal 100 runes is, Kalé sells throwing daggers for 40 runes apiece. Most armaments were netting me a whopping 2.5 throwing daggers. To make matters worse, enemies at this point required more than 3 daggers to fell, and they were dropping less than 100 runes, so mathematically speaking most engagements would put me in a rune deficit. This was going to be an uphill battle.
Luckily, 300 runes was exactly enough to buy the Crafting Kit, unlocking the crafting menu, which I would use extensively throughout the playthrough. Initially you can craft two critical recipes for the Chemist Run: the Fire Pot, which I mentioned earlier, and the Bone Dart, a handy throwing knife-type weapon that can be crafted with just 2 Thin Beast Bones, which you collect from the corpses of animals like wolves and goats. The problem was that I didn’t have any more runes to buy the 3 cracked pots Kalé sells, nor did I have any thin beast bones with which to craft bone darts. I also couldn’t hunt any animals at this point because I didn’t have damaging items yet: I needed items to hunt animals so I could craft items to kill enemies, but I couldn’t get items because I needed runes, and I could only get runes by killing enemies (which I couldn’t do) or selling items (which sold for paltry sums). In this moment, I had a spark of clarity.
Yes, indeed, I was a Prisoner in this hellish realm.
Most of the early game involved scrounging whatever I could find. Weapons, armor, upgrade materials, anything I was never going to use that could be sold off. There are glowing skulls which randomly appear in the open world that can be cracked open to reveal a rune item you can pop for 200 runes; they were remarkably invaluable in building up a small stockpile in the first hour of the run. Runes were an ever-crucial resource, and I knew they would become more plentiful later on, especially after defeating some of the major bosses who drop Remembrances; special items that work like the boss souls from previous Souls games. They can be exchanged for weapons, spells, or ashes of war related to the boss, or they can be consumed for a hefty rune sum, and that extra boost in runes would help shore up my supplies. Before any future windfalls, though, I had to make do with scraps and salvage. Eventually I was able to afford the 3 Cracked Pots and a full stock of 40 daggers from Kalé. Then I set off trying to find places to farm Mushrooms and Smoldering Butterflies for crafting fire pots.
Now, if you’ve played Elden Ring, you probably already have Mushrooms and Smoldering Butterflies in your inventory, but if I asked you, “Where would I go to farm these materials,” could you give me a good option off the top of your head? For me, the answer was “no.” I knew Butterflies spawned around campfires, and Mushrooms are found by rock walls, but I didn’t have an idea of where to go to farm hundreds of them efficiently. After some cursory research, I discovered two early game spots for both. There are two Mushroom spawns outside Stormfoot Catacombs, one of the first mini-dungeons you can discover from the start. I’d pick them, run to the grace site in the Catacombs, and respawn the mushrooms for plucking. Rinse and repeat. This would be a constant exercise for many materials. North of the Warmaster’s Shack were a couple fire slugs in a field, and around them swarmed 8 Smoldering Butterflies. You can get up to 3 Mushrooms per node, and the Butterflies would sometimes yield 2, so while I wasn’t farming these spots for hours, I would have to occasionally do stockpiling runs for ventures into new territories or dungeons.
With my meager arsenal, I made my way up to the Smoldering Church, on the border between the regions of Limgrave and Caelid. In this church are two cookbooks, one of which is the 14th edition of the Nomadic Warrior’s Cookbook. This book unlocks Poison Pots and Poisonbone Darts for crafting. These are poison variants of the two starter recipes. Poisonbone Darts became a staple part of my arsenal, allowing for a potent damage-over-time effect on larger enemies and bosses. I relied on them to such a degree that I immediately went down the road to the Warmaster’s Shack to defeat a nighttime-only boss, the Bell-Bearing Hunter, to get his Bone Peddler’s Bell Bearing, which unlocks thin & hefty beast bones from the shop in the Roundtable Hold. I found out the hard way that farming animals for bones with daggers was slow and inefficient, especially when they weren’t guaranteed to drop them, so unlocking a reliable source to buy them with runes would be far more convenient as enemy kills yielded more and more runes.
But I’m getting ahead of myself. The Smoldering Church is guarded by one “Anastacia, Tarnished-Eater.” An NPC invader who uses the same character model and capabilities as a player character. These types of enemies have been in the Souls games since Demon’s Souls, and while any other time I’d relish the conflict, NPCs were by far some of the worst banes of my existence during the Chemist Run. Unlike player characters who have limited FP and Stamina, NPCs have unlimited FP and Stamina. To add insult to injury, their AI is programmed in such a way as to chain-dodge projectile attacks, like my throwing daggers. Many of the fights against these opponents fell into an accursed rhythm, where I’d throw a dagger, they’d reactively dodge perfectly, I’d immediately throw another dagger, and by the time they were out of their first dodge, they’d be able to dodge my second dagger instantly. This could repeat until they closed the gap and unleashed an attack of their own, where we would trade blows, or until I stopped throwing daggers and resigned myself to baiting out one of their attacks. Waiting to throw the second dagger wouldn’t help, as they would already be in a neutral stance, ready to dodge it anyway.
Against some opponents, like Anastacia who uses the Elden Ring variant of the Butcher’s Knife, a new reiteration of a classic From Software melee weapon, baiting out attacks was straightforward and simple. Anastacia would often do a jumping attack which would lower her head just enough for me to get a headshot with a throwing knife, which does critical damage. Among all the NPC enemies I had to face, she was by far the easiest, but for others down the line, such as Juno Hoslow, Knight of Blood, I would have to resort to some pretty nefarious tactics in order to best them.
With new recipes in my repertoire, I needed to find a good source to farm Poisonblooms, which were required to craft Poisonbone Darts. Traveling south to the Weeping Peninsula, there’s a very small poison pool before Castle Morne on the southernmost tip. I wouldn’t exactly call it a poison swamp since it’s not quite large enough, but it does have Poisonblooms so that was good enough for me. Along the way, there was another merchant by the side of the road who would sell me Kukris.
Kukris are heavier knives which are slower to throw than all the other throwing knife items, but their damage scales absurdly well with Strength & Dexterity, and they apply bleed build-up, which takes out a massive chunk of health when enough is applied. Kukris are only 20 runes more expensive than the 40 runes-valued throwing daggers, but the amount of damage they can deal to bosses susceptible to bleed is absolutely ridiculous. Between this merchant and Kalé, I would go on to spend hundreds of thousands of runes stockpiling throwing daggers and Kukris whenever I had a surplus of runes to spend. Once I got to the point where I had more runes than I was comfortable carrying around, but not enough to level up, I’d also start pouring runes on a merchant in Caelid who simply sells Poisonbone Darts. He sells them for twice the price of Kukris, which is why I opted to craft them myself in the early game. Better to spend runes on levels and items which cannot be crafted, I thought.
These four tools – Fire Pots, Throwing Daggers, Poisonbone Darts, and Kukris – were all I needed to best Margit, the Fell Omen, one of the earliest major bosses. Being an Omen, Margit’s face is covered with winding, animalistic horns that give him a striking first impression. He uses a long cane-like weapon in battle, and combining it with his wizened visage makes his boss fight akin to fighting a cranky old man, albeit one who can summon spectral holy weapons, such as a large hammer, a sword, and some throwing knives of his own. Margit is a good fit for an early game boss in Elden Ring because he has optional extensions on some of his combos, and he drives home how important spacing is when facing bosses. Margit didn’t give me too much trouble on my first playthrough, but if Elden Ring is a player’s first Souls game, I imagine they might struggle quite a bit, and if they are able to overcome his attacks and best him, then they’ll be all the more prepared for the rest of the game. I would use Margit’s fight as a similar proving ground; an entry exam into the Chemist Run proper.
My first attempt was more of a test run to see what kind of damage throwing daggers would do, and I found that they only did 34 damage: Margit has well over 4000 HP, so just with throwing daggers I’d do roughly a third of his total health. I needed more weapons. Margit is the reason why I went to the Smoldering Church and the Weeping Peninsula. I didn’t know if he could be poisoned or bled, but at the very least I needed more things to throw at him. It turns out he was susceptible to both poison and bleed, and he went down with relative ease on my second attempt. That was when I knew I had a proof of concept for the Chemist Run. It was possible, for now.
With Margit out of the picture, I had access to Stormveil Castle, the proverbial capital of Limgrave. As the only valuable items inside were a couple of Cracked Pots I didn’t need right this moment, I decided to skip the castle proper for now. Bypassing Stormveil Castle in order to make it to the next region, Liurnia of the Lakes, is actually something I organically did on my first playthrough. It was a nice discovery, but I only bookmarked it in my mind for later playthroughs, and quickly warped back to exploring Stormveil. Now, however, was the time to employ this little shortcut. My actual goal was to journey beyond Liurnia to the Altus Plateau, but doing so requires scaling up a cliff-face mini-dungeon with a fair amount of enemy encounters and a boss fight that was probably above my pay grade for now.
Alternatively you can do what I did naturally on my first playthrough, and happen across one half of the Dectus Medallion. Both halves activate the grand lift which will take you from Liurnia to the Altus Plateau, and getting one half tells you where the other half is found. I already knew where both halves were, and it was a simple matter of running past all the enemies standing in my way, and climbing a couple ladders to get both halves of the medallion. Before arriving at the Grand Lift of Dectus on my trek through Liurnia, I made sure to befriend some lovely NPCs: Rya the Scout, who would help me arrive at the Volcano Manor later on; Blackguard Big Boggart, who would sell me some delicious boiled shellfish; and Jar-Bairn of Jarburg, who would welcome me to his little village and allow me to harvest as much of the plant life as I’d like, poisonblooms and mushrooms being chief among them.
Once I made my way to the Altus Plateau, I beelined it to the Shaded Castle in the north. Located there was one of the Perfume Bottles, and an enemy type known as the Depraved Perfumer. I wanted their equipment for my character, so I spent a couple runs whittling them down to get some drops. They were able to heal in much the same manner as a player character, but they weren’t quite as dodge-happy as typical NPCs. After acquiring new fashion, I traveled to the Perfumer’s Ruins to pick up two more Perfume Bottles, the Perfumer’s Talisman, and the first edition of the Perfumer’s Cookbook. All of this would allow me to make up to three Spark Aromatics; think of the infamous “Pocket Sand” scene from King of the Hill, except the sand ignites in a fiery blaze, and you have a good idea of how the Spark Aromatic works. With the Perfumer’s Talisman boosting perfume item damage, and Spark Aromatics scaling well with Dexterity, they were a potent addition to my arsenal, though I’d save them for special occasions since one of the materials needed to craft them, Miranda Powder, was somewhat rare since it must be farmed from Miranda Flower enemies.
Back to Stormveil, I was surprised at how easy it was to progress through the level. The Spark Aromatics made quick work of the knight you get locked into a room with, and while I was dreading constant resupply trips on my journey through the castle, my foreknowledge of enemy positions, grace sites, and shortcuts proved to be an invaluable asset. Killing the “spider” enemy was no trouble at all, and bypassing the courtyard with flamethrowers and crossbowmen proved little challenge as I made a cheeky jump from a battlement to a nearby rooftop, and then scurried along the lefthand side.
Collecting the two Cracked Pots on my way to the grace site next to the boss room, I prepared to face Godrick the Grafted, lord of Stormveil. Godrick is massive, with several extra human limbs sprouting from his grafted arms, and legs made up of several legs laced over each other. The man has taken the concept of the Ship of Theseus and applied it to himself to a viscerally gruesome degree. Despite his massive form, Godrick is somewhat easier than the more nimble Margit, and proper spacing is enough to bait out his favorable attacks that open himself up to retaliation.
I wanted to test the effectiveness of an Oil Pot into Fire Pot combo, as well as whether or not Godrick would be affected by Sleep Pots. Oil Pots weren’t quite as effective given the low base damage of Fire Pots to begin with: by my estimates they added 50% more damage which is nice, but I could get 100% more damage just by making another fire pot. Godrick was susceptible to being slept by sleep pots, and it can stun him out of his storm-channeling move, but he shrugs off the drowsiness quickly. A normal build would be able to take advantage of this short window, but items have a deployment time and thus couldn’t output a burst of damage in that window.
To my surprise, I did enough damage to push Godrick into his second phase, where he gains more wide-reaching and harder-to-dodge attacks, on my first try, and despite a couple close calls here and there, I even managed to fell him. On two other playthroughs, it took me at least two attempts to kill Godrick, but here I was throwing knives and bombs at him like a horrible Problems Clown and defeating him in one shot. Luckily for me, Godrick is maidenless and thus doesn’t have a wife to shield him from knives and dematerialize my body.
With Stormveil’s Man of Arms out of commission, I felt confident that I could take on the rest of the Chemist Run. The Academy of Raya Lucaria, the capital of Liurnia, wasn’t much trouble at all – poison knives and bombs are a much better response to the academy’s glintstone scholars than rushing through their spells with swords, as it turns out. Deeper exploration of Liurnia also granted access to a cookbook with the Crystal Dart recipe, which is immensely powerful even for non-chemists. I could’ve picked this up in my earlier excursion but I simply forgot about it.
Crystal Darts are magic throwing knives that scale their damage primarily with Intelligence, cost FP to use, and deal magic damage. They only require Cracked Crystals to craft, and the Raya Lucaria Crystal Tunnel has 4 nodes right next to the grace site. They’re easy to craft, do good damage (if you leveled Intelligence), and they make it cost-effective to explore new areas, since you can save supplies that require runes or crafting materials that are more time consuming to gather. Crystal Darts also send construct-type enemies like fanged imps or golems into a berserker state where they will start attacking anything in their vicinity, not just you, which makes them even more useful in areas where those enemy types are common.
Raya Lucaria houses the two bosses that must be felled in order to unlock the aforementioned attribute reallocation option; the Red Wolf of Radagon, and Rennala, Queen of the Full Moon. Both are susceptible to bleed and poison, and both use magic spells to deal damage, though in the Red Wolf’s case it can also do your standard suite of “big dog” attacks. The same cookbook that had the Crystal Dart recipe also had one for Spellproof Dried Livers – a consumable item that boosts magic negation. These two fights seemed like as good a time as any to deploy them, and while I’m sure most players will simply forget about items like these, they can be just the thing to save you in clutch situations, and if you eat them before entering a boss arena, they’re free damage mitigation.
As for Rennala herself, her boss fight is something out of an old nursery rhyme. Her distinctive headpiece and general appearance bring to mind images of early twentieth century children’s books; there’s something nostalgic about the presentation of her floating amidst a magical library, cradling her amber egg and cooing softly to the scholars below. The scholars crawl around the floor and attack you, while a bubbled one chants a little tune to maintain Rennala’s golden barrier, and they add an oddly cute charm to the fight. I learned that Crystal Darts were useful for popping the chanting scholar’s bubble from a range: I initially thought you had to outright kill the scholars, but learning that one dart was enough to satisfy the mechanic made the first part of her fight much quicker. Three quick darts popped Rennala’s golden barrier, opening her up to attacks. Spark Aromatics were my best option for burst damage, and half her health was gone within the first thirty seconds of the fight just with their damage alone. Once her first health bar is depleted, Rennala’s second phase begins: The full moon rests upon a horizon of night sky and deep water, as the Queen of the Full Moon herself attacks with the sorceries she’s perfected over countless years as head of the Academy. It’s one of the more memorable fights against a master of magic that From Software has ever produced, and it forced me to learn how to dodge all her magic attacks and spirit summons appropriately. By spacing myself away from her, she refrained from using her quick staff attacks, sticking instead to ranged sorceries which I had more time to dodge. Though her second phase is more visually striking, I find her first phase more interesting. It’s as if someone asked the question “what if we made an old-timey elementary school classroom into a boss fight?”
Rennala was the first fight that I had some level of challenge with, to the point where I opted to change my control scheme. Normally, on a standard games controller, you press Down on the D-pad to cycle through your items, and you can hold that input to jump immediately to the item in the first slot, but that requires either taking one’s thumb off the control stick used for movement, or using the infamous and painful “claw hand” formation to have access to both the D-pad and the control stick at the same time. Instead, I assigned item cycling to the L2 or Left Trigger button, which made Chemist Run combat much smoother. I could cycle through items and move around at the same time, but this came at a weird cost: Elden Ring doesn’t let you leave any of its built-in controller actions unassigned. Normally, the L2/LT button is used for Skills – the Ashes of War I was forbidden from using on the Chemist Run. Since I couldn’t use them, it would’ve been preferable to leave this action unassigned, but Elden Ring forced me to map this action to Down on the D-Pad. This didn’t seem like a big deal initially, but the D-Pad is used to activate Pouch item shortcuts when combined with Triangle or Y, as well as zooming in and out with the Telescope tool. Apparently, by reassigning Down on the D-Pad to the Skill action instead of its default, it prevented me from doing either of these actions; I couldn’t use one of the 4 Pouch Item shortcuts, nor could I zoom out after zooming in with the Telescope. If you decide to do a Chemist Run yourself and change the control scheme in the same way, be aware of this functionality quirk.
Vanquishing Godrick and Rennala allowed for access into Leyndell, the capital city of the Altus Plateau and the Lands Between overall, being the seat of the Elden Lord. I remember spending hours combing over much of the capital’s multi-layered level design, from rooftops to Perfumer shops, to the lower streets and the subterranean underground. This time, however, I made a beeline for all the important items I could need. With Stormveil Castle and the Academy of Raya Lucaria, I fought most enemies with little issue, but with how durable Leyndell’s knights and soldiers were, I thought it best to simply run past everything I could. Before entering the capital city, however, there’s an overworld boss blocking the way- the Draconic Tree Sentinel. Since you face him in the overworld, the horse Torrent is available for use, but the Sentinel has red lightning attacks that can do nasty damage to riders if you aren’t careful.
There is a “cheese” strategy involving a Poison Mist spell that you can use to poison the Sentinel from behind and kill him without ever entering combat, but much to my dismay, the Poison Spraymist perfume item, which functions identically to the spell, cannot be used for this purpose. I believe it’s because the spell can be performed while crouched, whereas using any item forces the player character to stand up, and using items alerts enemies to your presence. This was the first fight where I opted to use spirit ashes, which I had been doing for some mini-dungeon bosses here and there. I opted to use the Fanged Imps for this fight, since I wanted to see how effective “construct” spirits would be: they felt thematically appropriate for the run. Ultimately the Fanged Imps helped apply bleed to the Sentinel, and distracted him enough for me to fling bombs and knives at him with relative impunity.
Leyndell has two bosses: a golden spectral form of Godfrey, the First Elden Lord, and Morgott, the Omen King. The former would prove to be a decent challenge, if only because I destroyed him quite quickly on my first go-around, and I hadn’t had the chance to properly learn his moveset. “Golden Godfrey” doesn’t have a lot going on (he’s a big golden guy with a huge greataxe), but he’s immediately followed by Morgott, whose heavy-hitting attacks destroyed me in three attempts, while I barely did any damage to him in return. It was at this point that I realized “hey, maybe being level 43 at this point is a problem.” Skipping several enemies and spending lots of runes on knives has a way of eating into pne’s level-ups, and I looked toward researching “rune farms” so that I could put more points into Vigor for survivability.
It was then that I found videos showcasing the famous Giant Ball farming method. In Caelid, just down the road from Lenne’s Rise, there’s a magical Giant Ball enemy that spawns and rolls down the road at a high speed. This ball is meant to serve as a magical trap when heading to the Rise via a road leading in from the west, but if you approach the Rise from the southern cliff, you can bait the ball into launching itself off the nearby cliff, where it dies. Since it’s an enemy and not an object, its death rewards you with about 2,000 runes. Then it’s a simple matter of running back up the road and resting at the site of grace to reset the trap, rinse and repeat. This area also has several glintstone crystal formations, upon which are Glintstone Fireflies. Much like how Cracked Crystals are the only ingredient needed for Crystal Darts, Glintstone Fireflies are the only ingredient needed for Magic Pots, the magical version of the Fire Pot. Farming this spot pulled double-duty, and I’d highly recommend it for an early game rune farming option, since it’s relatively simple to get there even when starting out, and you don’t even have to do actual combat.
Before farming this ball, I sought out the Gold Scarab; a talisman located in a cave dungeon in Caelid. The Gold Scarab adds an additional 20% rune bonus any time you collect runes from enemies. This doesn’t work on runes gained through consumable rune items or boss remembrances, but the Gold Scarab bonus does work on boss kills. I would keep this talisman on for the entire rest of the playthrough, and the extra runes accounted for literal thousands of additional knives, and I’d consider it mandatory for a Chemist Run since the majority of talismans offer little to no advantage without weapons, spells, or ashes of war at one’s disposal.
Speaking of talismans, two others I would test were the Blue Dancer Charm and the Winged Sword Insignia. I acquired the former in this interim period between Morgott attempts, and did a cursory test to make sure it worked, but I would test both later on when looking into ways to further augment damage. Both of these talismans increase damage, but in different ways: the Blue Dancer Charm increases scaling physical damage based on the lightness of your character’s equipment; the Winged Sword Insignia raises attack power with successive attacks. Since I wasn’t wielding armaments and I was attacking rapidly with flurries of knives, I figured both of these would boost my damage.
Using the large troll outside Godrick’s boss arena as a test subject, I would throw a flurry of 15 Throwing Daggers at him from a static range, record the damage numbers, and calculate the average damage each dagger did. With neither talisman, daggers were ranging from 123 to 129 damage. With both talismans, that average bumped up to 138, but curiously with just the Blue Dancer Charm, the average inched up to 140. I didn’t want to spend an exhaustive amount of time testing the efficacy on different enemy types and using different items, but this small test gave me enough answers to be satisfied. The Blue Dancer Charm did indeed work with items; as long as you have under 30 equip load, you get a damage bonus. I kept my character under 20 equip load throughout the run, which offers a slightly larger damage boost, but not the maximum boost the charm can provide. Both talismans didn’t work in conjunction with each other — they might do so for normal weapons, but items wouldn’t benefit from the Winged Sword Insignia, and I chalked up the damage increase seen in both talismans to being solely thanks to the Blue Dancer Charm. If both charms wouldn’t work at the same time, then there was only a point in equipping one, and I would stick with the one I knew worked, and that didn’t rely on rapid successive attacks, since that’s not always possible to accomplish for every encounter.
Back to rune farming, the ball method gave me a fair amount of runes and glintstone fireflies for magic pot crafting, but I needed something faster. The ball method was good for early game, but I was nearing the late game of Elden Ring at this point, and 2,000 runes per ball wasn’t going to be fast enough, even with the Gold Scarab bonus. There was the giant dragon in Caelid that many players use to get nearly 100,000 runes early on, but this is a one-and-done affair, and while I was able to fell that dragon eventually, you would not believe how many shit pots I had to throw at it. Fetid Pots are an evolution of the Dung Pie items found in the Dark Souls trilogy; they inflict build-up of Deadly Poison, but also builds up Deadly Poison on your own character, and given how powerful the toxin effect is, this self-inflicted build-up has been the main way this item has been balanced by From Software. “Shit pots” isn’t a euphemism either; one of the ingredients required to craft them is Gold-Tinged Excrement, which you can find scattered on the ground throughout Limgrave.
The dragon’s hurtbox is quite strange, too; knives deal damage to it but they get stuck outside of its model, and they only deal damage from certain spots (a common point of attack on normal playthrough is its tail, which knives go right through without dealing damage). I almost ran out of items to attack it with, and while resting at a grace would refill my stocks, it’d reset the dragon’s health as well. Once it finally went down, I had a good stash of runes, but I would need a repeatable method to sustain my chemist.

Fortunately, I had been working on a rune farming method without even realizing it. One consumable item in Elden Ring is the Bewitching Branch –- it’s a branch you poke an enemy with and it causes them to ally with you for a time, attacking other enemies instead. You can only acquire the cookbook to craft these from Sir Gideon Ofnir, the All-Knowing, after you visit an optional late-game area, Mohgwyn Palace. Palace access requires access to the Consecrated Snowfield, another optional late-game area. Alternatively, if you complete White Mask Varré’s questline, he gives you an item that teleports you halfway through Mohgwyn Palace, and this is enough to satisfy Sir Gideon, who gives you the third edition of the Fevor’s Cookbook, allowing for the crafting of Bewitching Branches.
I had been doing Varré’s questline to acquire this cookbook; he requires you to invade three other players, and while I actually succeeded in one invasion, the results are irrelevant. Summoning other players to assist with combat was against the spirit of the Chemist Run, but being summoned to assist other players, or invading other players felt like fair game so long as I stuck to items exclusively. While I started Varré’s questline for the cookbook, I gained something far more valuable; access to one of the best rune farming methods in Elden Ring.
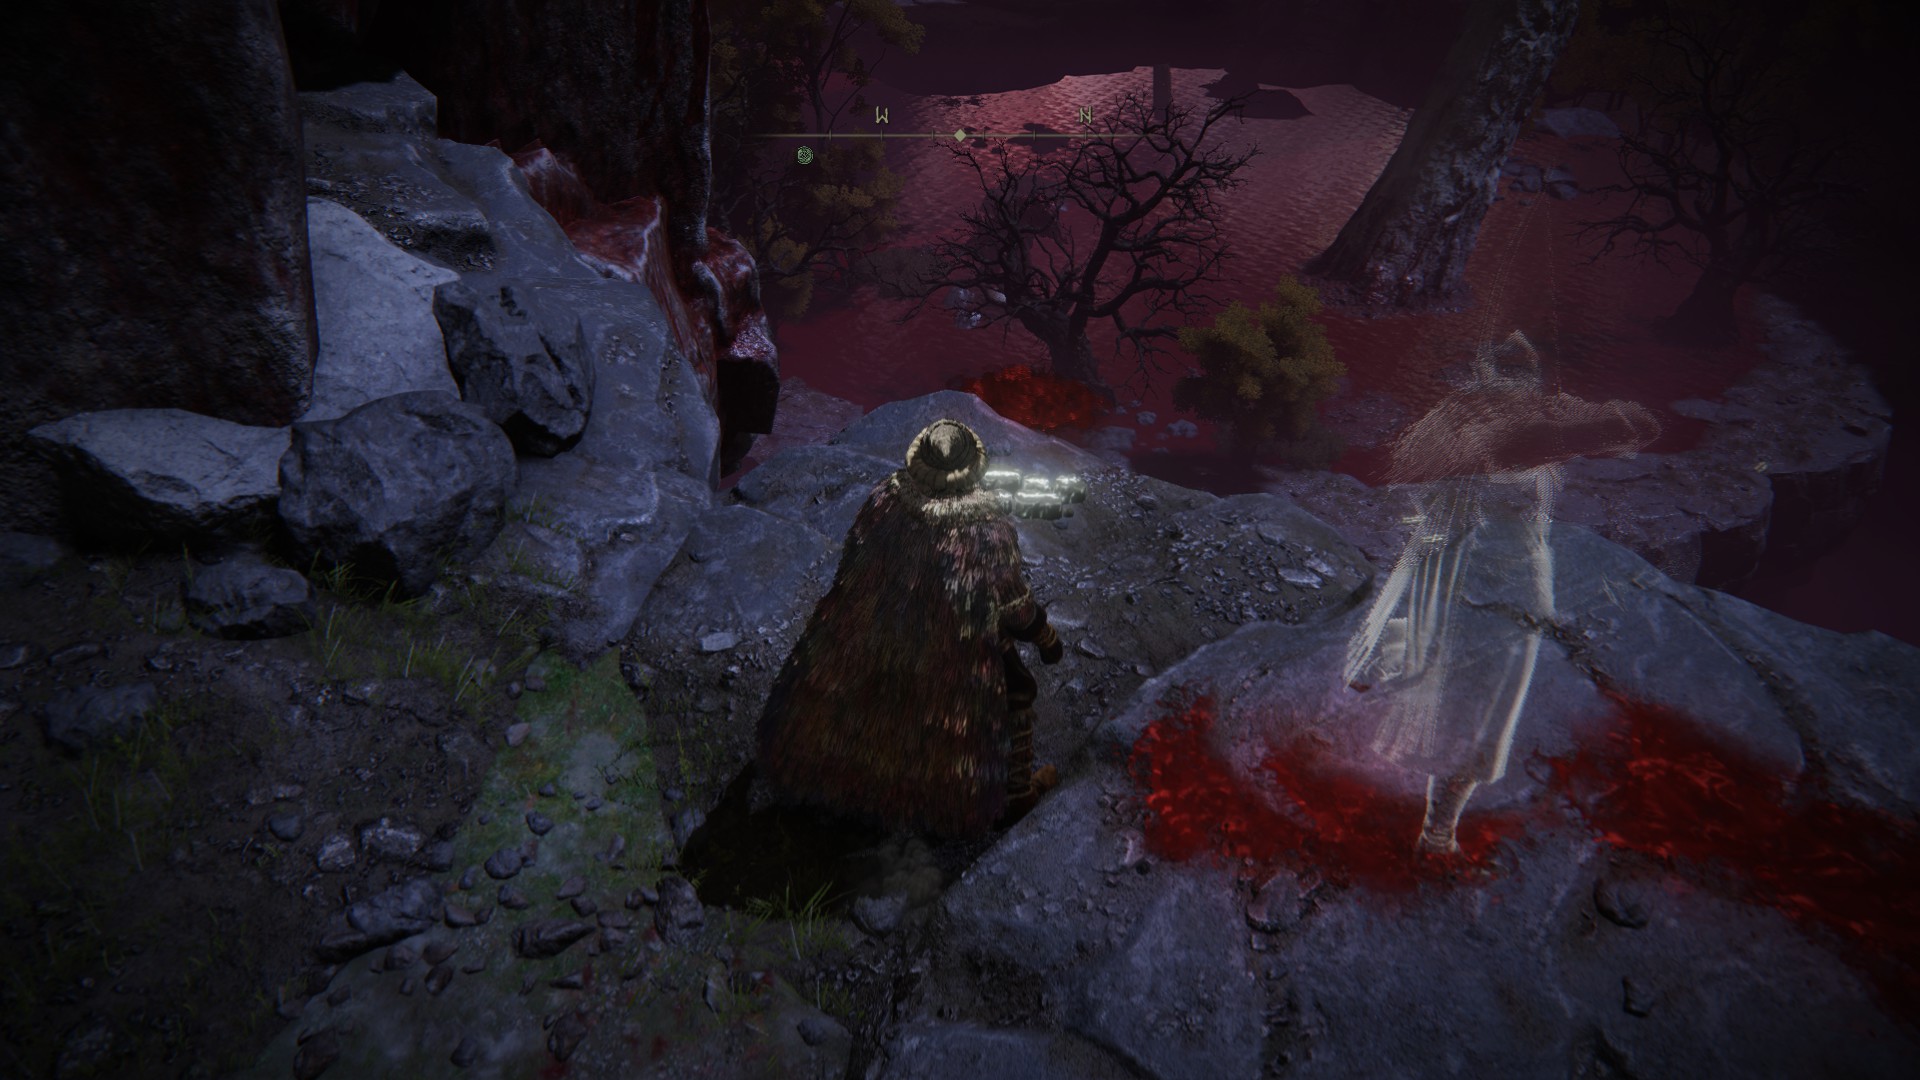
Mohgwyn Palace is divided into two parts: there’s the palace approach, and the palace proper. Varré’s item drops you in between these two parts, and the rune farming spot is at the beginning of the approach. With Torrent, it’s relatively quick to make it through the approach as long as you don’t try and pick up every little item on the way. Once you arrive at the Palace Approach Ledge-Road site of grace, you can begin the rune farm. The site of grace overlooks a canyon, and on the other side is a lake of blood that’s patrolled by a giant crow. If you attack the crow with a ranged weapon, it will rush at you and run right off the cliff, into the canyon where it dies, giving you 13,245 runes (with the Gold Scarab). This method is completely safe, fast, and easy. Normal players farm this crow with a bow and some arrows, or with spells, but my chemist had a bit of a problem—knives and pots don’t quite reach over the canyon. The crow itself patrols in such a way that it walks toward the cliff and then away from it, so even if I could arc pot throws to crash on the crow, it’d be far too time-consuming and taxing on resources to test out the trajectory and craft pots and line everything up perfectly. So, how is a chemist supposed to make use of this method?
Enter the Wraith Calling Bell.
The Wraith Calling Bell is a tool item that consumes FP every time it’s used, but it can be reused indefinitely once acquired. It’s located in Laskyar Ruins, one of the earliest locations in Liurnia, and I got it super early in my playthrough. It summons a wraith that chases down your target. The wraith has fairly low damage and poor scaling, but it makes up with that in its low FP cost, long range, and excellent tracking ability. The last two are crucial for hitting the crow as a chemist: you can spam a relentless barrage of wraiths that will track down the crow, hit it, and cause it to run off the cliff, rewarding you with runes in the process. There were some collision issues with a tree that blocks some of the projectiles, but this was by far the best method for farming runes which I could always fall back on if my resources ran dry.
This crow gave me enough runes to level my character from 43 all the way to 105, and with that I felt more than ready to take on Morgott, but before that, I wanted to address another facet of the Chemist Run. Part of what inspired me to do this was that I kept finding items and equipment that made it seem like an item-only build would work, and one of those was the Jar helmet that the Living Jar NPC Alexander the Iron Fist gives you as part of his questline. I started doing this quest in patch 1.03, where they added a new NPC in the form of Jar-Bairn. Jar-Bairn gives you the Companion Jar talisman at the end of his questline. Both the Jar helmet and the Companion Jar talisman boost the damage of your pot items, and they sound like they’d be imminently useful on a playthrough where you’re only allowed to use items, right? Unfortunately, my Chemist Run would never acquire these items, due to how NPC quests work in From Software games.
The Alexander Incident
Alexander’s quest starts in northern Limgrave. You’re supposed to hear him shouting for help, and find him stuck in a hole. After smacking his chiseled ass out of the hole, he rewards you with a gesture and some Exalted Flesh (an attack-boosting consumable). He never spawned in this hole on my Chemist Run. The hole was there, but Alexander was not. After this, he can be found in Gael Tunnel, in between Limgrave and Caelid. He’s located in the rear entrance to the Gael Tunnel on the Limgrave side, stuck behind a locked door; enter from the Caelid side, make your way to the door, and open it for him to thank you. He was never in this tunnel on my playthrough. He next shows up in Castle Redmane, the capital (or what’s left of it) of Caelid, where he takes part in the Radahan Festival, an event centered around defeating Starscourge Radahn, one of the four bosses you can defeat to enter Leyndell. I had already defeated Godrick and Rennala at this point, so there was little reason for me to fight Radahn outside of progressing Alexander’s questline. He actually was at the castle, and it’s here where we finally met. At this point, I figured the questline was intact, so I proceeded to challenge Radahn.
Starscourge Radahn is a challenging boss, except he’s also one of the easiest if you want him to be. He is the one major boss fight where I didn’t publish the footage I recorded, but not because I made him easier. Radahn only took two tries to fell, but the reason I didn’t publish the footage was because much of it involved me running around trying to replicate a glitch where you make him chase you up a cliff face and once up there, he charges off of the wall to his death. I was never successful at getting it to work, and eventually gave up and just killed him by summoning the squad of NPCs tailored for this fight, while occasionally poisoning him and pelting him with knives. The NPC summons are what make Radahn an easier fight: You can treat him like a normal Souls boss, or you can treat him like a gimmick Souls boss, depending on which brand of boss flavor you’re interested in. I did most of the learning part of his fight on my first playthrough, so here I was resolved simply to let the game give me this freebie. It would be the first of only two easy wins the game would give my chemist, and the second one would require me to work for it.
After Radahn is defeated, Alexander’s questline takes him to Liurnia, just above the cliff that leads down into Jarburg. His appearance here is supposed to be a clue about Jarburg’s existence if you aren’t privy to it already. He’s stuck in a second hole and you have to smack that chiseled ass once more, but this time you have to oil him up before you do so. This wasn’t an issue since I already had the recipe for concocting Oil Pots, but this brought another issue to light. One of the concerns I had going into the Chemist Run was this: you’re supposed to smack Alexander out of two holes on his questline, but would throwing daggers suffice? Initially I suspected this would be the element that would break the questline for me, but it was here I found my answer. Knives of any kind deal some amount of stagger damage, and it’s the stagger damage that knocks Alexander out of the hole. Throwing Daggers deal a fair amount, but I still had to throw about a dozen or so before he’d pop out. After he was free, he gave me the gesture I should’ve gotten in Limgrave, as well as some Exalted Flesh. I thought everything was well.

It was not.
After being freed from the hole in Liurnia, he talks about heading to Mt. Gelmir, and indeed that is where you find him next just below the western side of Volcano Manor, the mountain’s capital. It is there where he rewards you with the Jar helmet. You have to defeat a Magma Wyrm overworld boss in order for him to move, but these are a dime a dozen and aren’t that challenging to defeat. Tragically, Alexander never made it to Mt. Gelmir on my Chemist Run. He went back to Radahn’s boss arena, eternally scooping up soldiers to push into his battle-hardened body. Nothing I could find online gave a reason as to why his questline was broken, and I tried several methods of fixing it: restarting the game, reloading areas, attacking him to the point where he became an enemy and then seeking forgiveness at the Church of Vows to pacify him. None of it worked.
I had an idea that, with the implementation of Jar-Bairn, Alexander’s questline had been affected in some respects, so I sought to progress the quest from the other side of it. Jar-Bairn is tied with Knight Diallos, an NPC you meet the first time you visit the Roundtable Hold, the hub area of Elden Ring you get access to early on. Diallos’ questline takes him to Volcano Manor, and this is where Rya comes in. You remember Rya, right? I met her on my first trek through Liurnia? If you help recover her necklace from Big Boggart, then she can warp you to Volcano Manor, avoiding the nasty climb up Mt. Gelmir. It was here that I became a Recusant of Volcano Manor, and picked up a perfume bottle for my troubles. Progressing Diallos’ questline involves progressing the Volcano Manor questline, which involves invading NPCs and killing them.
Previously I mentioned how NPC enemies were some of the worst ones I encountered on my Chemist Run, but most of these encounters were one-shot affairs. I even did the bonus invasions you can do for Recusant Bernahl and Patches the Untethered, two other NPCs who join the Manor. Patches can be met early on in Limgrave, and he’d be a valuable merchant as the only source of purchasable Fan Daggers, one of the more powerful throwing knife items.
Eventually after enough invasions, Diallos left the Volcano Manor and relocated to Jarburg, which is where his questline continues with Jar-Bairn. I progressed this half of the questline all the way through to its conclusion, but sadly, this didn’t repair Alexander’s questline. I currently believe that Alexander’s questline broke because I never freed him from the hole in Limgrave, and I suspect that he frees himself after you pass a certain checkpoint. It’s possible my premature venture into the Altus Plateau skipped over some flags necessary to get his questline to work properly, but that’s just my best guess.
With Alexander’s questline in shards, I would acquire neither the Jar helmet nor the Companion Jar Talisman. A tragedy to be sure, but the Souls games are all about pressing on in the face of such setbacks. I made for Leyndell, and my rematch with Morgott, the Omen King.
—
Morgott was much easier at level 105 than he was at level 43, but he still wasn’t a pushover. I summoned Melina for this fight, and accidentally summoned the Soldjars of Fortune. I did want to test them out since I had been denied the Jar helmet, but I had expected to summon the Fanged Imps instead and simply forgot to reequip their ashes. The Soldjars of Fortune are funky little guys with a lot of gumption and I love them, but they aren’t particularly effective against Morgott. They are slow and easily staggered, while Morgott is agile with a plethora of heavy attacks. Their one signature trick is upon receiving a fatal blow or a hint of fire damage, the Soldjars explode, but the explosion is barely worth the cost of summoning them, especially since they are a rare spirit ash which consumes HP instead of FP upon summoning. Still, they provided a useful distraction and their efforts should be applauded.
Margit’s Shackle, the item I bought from Patches, can be used in this fight to stun Morgott briefly (Margit and Morgott are the same person if that isn’t clear, though when fighting him as Morgott he has more spectral holy weapons at his disposal), and while I did remember that the Shackle can only be used twice per attempt, I foolishly forgot that it doesn’t work during the last half of the fight, after his curse spills out from his wounds. Melina is a powerful ally for this fight, and her magic tree spell can heal both of you and any spirit ashes you’ve summoned, provided they stand in its vicinity. Overall, my preparations for the rematch were successful, despite my blunders.
Leyndell was now kingless, and Morgott’s Remembrance was the only one I exchanged for an item, rather than consuming for runes. In this case, the item was the Regal Omen Bairn: a powered up version of the Omen Bairn, a doll-like item I had missed earlier. Both fire wraiths similar to the Wraith Calling Bell, except the Regal Omen Bairn explodes with about a dozen or so wraiths at all once, which all do more damage and reach their maximum speed faster. It would make farming that crow much faster, but it cost too much FP to use in battle, at least for my purposes.
The Chemist Run had entered the late game of Elden Ring. Half of the mandatory bosses were gone, and there was one half left to go. Morgott’s defeat allowed me access to the Forbidden Lands, a small corridor area on the way to the Grand Lift of Rold, which rose up to the Mountaintops of the Giants. The Fire Giant there was the next mandatory boss, but as you might expect, I wanted to take some detours.
Something I had decided way back at character creation was the ending I was going for on this character. I figured only a madman would try taking on the Lands Between with just items, so I opted for the path of the Frenzied Flame. This was also because one item is the Frenzyflame Stone. It works like a Warming Stone, a rock you drop on the ground that radiates healing energy, except the Frenzyflame Stone causes Madness build-up in characters not allied with the Frenzied Flame. Madness is a devastating status effect that not only rips out huge chunks of HP, it also lowers FP and stuns targets when they’re afflicted. It’s a powerful status effect, but I failed to realize that it only works on Tarnished enemies like the player character, or other players. Nevertheless, the Frenzied Flame still felt the most appropriate for my chemist, especially once I looked up how to acquire the armor set I wanted for my chemist.
The Nomadic Merchant’s Set is the same outfit Kalé, and indeed all the merchants in the game wear, the same merchants who I had been relying on all this time to deliver me cookbooks and consumables and countless knives. I knew it existed as armor wearable by players from various messages and bloodstains I happened across, where other players’ characters were wearing it. When I looked up how to acquire this set, that’s when I learned about a hidden path in the sewers that led to the Frenzied Flame. That caught my attention; what did the merchants have to do with the Frenzied Flame? Why was the armor set located all the way down in the sewers, when the merchants sell outfits worn by all the starting classes? Surely it would make more sense for them to sell their own set, right?
You have to do a weird video game thing in order to get the outfit, akin to some of the wild stuff you have to do in Castlevania II: Simon’s Quest. Down below the city, at the bottom of the sewers, there’s a corpse with the set under a tent, but these tents are all over the Lands Between and none of them are breakable. In order to break the tent, you have to lure a nearby enemy to the tent, and then get it to use its frenzy attack on the tent, which shatters it and allows access to the set. Nothing in the game hints at this interaction between the enemy and the tent: I’m left concluding that the placement of the item, the tent, and the enemy, is meant to be an accidental discovery. The tent is on your left after crossing a beam situated above a massive square pit, and the enemy walks up some stairs to the tent room from your right. The enemy will likely attack the player with the frenzy spell, and the player might run next to the tent to get some distance, since the spell has a short range. It’s quite a bizarre sequence for what is ultimately just an okay armor set, but after acquiring it, I finally read the description of its pieces:
“Finery of the nomadic merchants.
Decorated with tiny gems in a wide spectrum of colors.
These merchants once thrived as the Great Caravan, but after being accused of heretical beliefs, their entire clan was rounded up and buried alive far underground.
Then, they chanted a curse of despair, and summoned the flame of frenzy.”
– Nomadic Merchant’s Finery
Upon first meeting him, if you make small talk with Kalé, he mentions how his people are wanderers who were spurned by the grace of gold, and while they journey unceasingly, it has made things easier for them now: the Elden Ring is shattered and many people are afflicted, but the merchants are carrying on as they have, as if nothing has changed, because that truly is the case for them. Kalé adds that he thinks this “[….]makes us kindred spirits of sorts. Your people, the Tarnished, and mine.”
The area where you find the Nomadic Merchant’s Set is filled with corpses who all wield the same peculiar instrument that the merchants do. The enemy who breaks the tent does as well, and there are some passive enemies who are sitting down and playing a somber song with it, resting among a field of corpses just like them. It’s quite depressing, maddening even. These merchants had been the reason for this run’s success: without their cookbooks and knives and cracked pots, it would’ve taken an age or two to finish this run. It made sense now more than ever to become Lord of the Frenzied Flame on this run: The curse of despair would ring true in the Lands Between before long, and the flame of frenzy would ignite the Erdtree with indignation.

Melodrama aside, with the Frenzied Flame properly inherited and the new outfit acquired, I was still curious about the Alexander questline. I was hoping that defeating Morgott would progress it, since Alexander is available as a summon for the Fire Giant fight—the next mandatory boss in sequence. Sadly, Alexander was still in Radahn’s boss fight. Then I had an awful, terrible idea: “What if you have to defeat Praetor Rykard, Lord of Volcano Manor, in order to progress Alexander’s questline?” It made sense in my head because he wouldn’t move to Mt. Gelmir until the region’s biggest threat was eliminated, since he was planning on bathing himself in the lava and reforging himself anew, as it were. And so I endeavored to complete the Volcano Manor questline, in order to bypass the Volcano Manor level and get a free warp right to the boss room.
The final mission for the Volcano Manor is to defeat Juno Hoslow, Knight of Blood. You might remember him from earlier when I was talking about how NPC enemies were some of the worst ones to fight in the Chemist Run. Juno Hoslow was one of the worst NPC enemies, tied only with another character we’ll get to later. Juno makes Vyke look like a cakewalk, since there’s no cliff to bait Juno into falling over. He dual-wields deadly whips which build up bleed damage, and he’s just as dodge-happy as any other NPC.
The only way I was able to best him was to use an AI glitch: there’s a rocky pillar on the right hand side of the dueling area you fight him in, and behind the pillar is a cliff wall. If you wedge yourself up the wall, it breaks his AI in such a way that he forgets to dodge roll, and this makes it easier to hit him with knives and pots. I even used some Frenzyflame Stones on him to build up Madness, and while that was effective, I tried it before resorting to this glitch method. It’s still possible to get hit by his whips since they ignore wall collision, and you have to constantly trick him into getting stuck since he corrects his movement after a time, but this was the only way to reliably poison him. I also employed the Ancestral Infant’s Head, a deer-like skull item that unleashes a puddle of spectral water that lingers and damages enemies who stand in it. It was a decent option for when Juno got too close to me, but its low damage and significant wind-up time made it less than ideal for extensive use. Eventually, after many knives and bombs, the Knight of Blood was bested in the ring of dishonorable combat, and a wave of relief washed over me briefly, only just subsiding into a cold, chilling realization:
Juno was just the prelude to one of the biggest mistakes I’d make on the Chemist Run.
The Rykard Incident
Lord Rykard is one of the four main bosses in the first half of Elden Ring. As you’ll recall, between him, Godrick, Queen Rennala, and General Radahn, you must defeat at least two to complete the game. By this point, I had long felled Godrick and Rennala, and Radahn was a less-distant but still distant memory. Rykard was the last boss I wanted to fight on the Chemist Run, because he’s the latest iteration on a signature gimmick boss setup From Software games have been employing since the beginning. Demon’s Souls and Dark Souls 3 both have a mandatory boss fight that requires the use of a special weapon, the Storm Ruler greatsword. In both games, the Storm Ruler has a special attack when fighting the respective boss, which enables the player to kill them in a reasonable amount of time. The Storm Ruler reaches up into the sky to slice at the Storm King in Demon’s Souls, and its tempestuous might brings Yhorm the Giant to his knees in Dark Souls 3.
Rykard is designed in a similar manner: the player is offered the great spear Serpent-Hunter right as they enter Rykard’s boss arena. The weapon gains increased range and damage when fighting Rykard, and the boss has an inflated health pool to account for the spear in question. To add insult to injury, Rykard has two phases: First, you face the God-Devouring Serpent, a massive tangled snake reminiscent of the snake balls from Bloodborne, and then you face Rykard, Lord of Blasphemy proper, whose visage rests on the back of the Serpent’s neck, and who wields a large sword encrusted with the forms of all the people he’s consumed up to this point. Both have inflated health, and both are very dangerous, as they are constantly surrounded by a pool of lava, and the arena you fight them in has pillars and piles of charred corpses that are easy to get stuck on while trying to dodge and reposition yourself. Rykard’s sword is massive and he also spews out a flaming skull that traces an explosive path through the arena, all while Rykard himself slashes and stabs at you with his sword. And here I was deciding to fell this monster of monsters with a small collection of cutlery and a few explosives. It was going to be an uphill battle, but I was resolved to do it. It was time to prepare for the serpent hunt.
My first attempts at the God-Devouring Serpent were tests to see if it could be poisoned and bled: both were successful. I was able to make it to Rykard himself once, but I realized I was out of knives, and didn’t have enough damage to finish him off. I combed over a spreadsheet I had been using to keep track of important item locations. There was one critical item I could rely on in this fight that would create absurd amounts of damage. I only needed to get the cookbook for it, but getting there was a lengthy process. I had already started this process beforehand, before even facing Juno Hoslow: it started back in Liurnia.
North of Raya Lucaria sits Caria Manor. This manor is teeming with horrible hand enemies and several spectral soldiers, but running past everything here was about as straightforward as it gets. The main things I grabbed here were the final cracked pot, the sixth edition of the Glintstone Craftsman’s Cookbook and a ritual pot which I purchased from Pidia, a servant squirreled away on the balcony of the small chapel in the manor’s interior. The cookbook allowed for the crafting of Freezing Pots, which are the only source of the Frostbite status on a Chemist Run. Frostbite does damage but also lowers a target’s defenses: a good option to have in a pinch. The boss of Caria Manor is the spirit ash form of Royal Knight Loretta, who was felled easily enough. Past the Manor were the Three Sisters, a trio of sorcerer towers. The middle tower was the home of Lunar Princess Ranni. In a similar manner to Alexander, I never met Ranni in Limgrave, so it was here that I met her properly for the first time. Pledging to ally myself to her cause, she sought a treasure from Nokron, Eternal City, located deep below Limgrave.
It’s a good thing I had already killed Radahn, since if I hadn’t, I’d now be tasked with doing so, as felling him is required to access Nokron. The Eternal City is split into an upper and lower half. You enter the small upper half, and make your way down to the lower half, which is still small but no less dangerous. There’s a boss at the end of the upper half: the Mimic Tear. This is a boss that mimics your player character, right down to their equipment and item slots. A common tactic to make this fight easier is to strip all your gear off, and then once the Mimic Tear copies your naked form, reequip yourself and destroy it. I didn’t do this on my first playthrough, and I didn’t think I’d need to do it on this playthrough, so I went into it normally.
The Mimic Tear did indeed use the items I had equipped, but it mostly relied on pathetic punches that barely did anything to me. While Radahn was a fight I recorded and never published, the Mimic Tear was a fight I never recorded and wish I had, since there was a moment where it unleashed a flurry of punches upon me, and they didn’t move my HP bar at all. Because the Mimic Tear didn’t have weapons of its own, defeating it with just items was the easiest NPC fight in the game, since I didn’t have to worry about [meaningful] counterattacks. The rest of Nokron was uneventful—lots of sneaking past enemies when I could, and running past ones I could not. It’s here where I picked up that Ancestral Infant’s Head from earlier, though I never found a good use for it. I think if the puddle lingered on the ground three times longer than it does currently, it’d be a good item to have, but ultimately I only used it in that fight with Juno Hoslow. My goal in coming to Nokron was the quest item Ranni wants located at its center: the Fingerslayer Blade. Returning this to her at the Three Sisters allows for the continuation of her questline, and it allows me access to Renna’s Rise, which has a sending gate in its highest chamber, granting me a path to the Ainsel River Main.
The Ainsel River Main is where you pick up the small doll Ranni, and after running through everything and defeating the shadow invader version of Blaidd the Half-Wolf, one can progress to the target area, the Lake of Rot. It is here where the twenty-second edition of the Nomadic Warrior’s Cookbook is found, allowing for the crafting of Rot Pots, the only source of the scarlet rot status effect I would have access to on this Chemist Run. I could have used the Rotten Stray spirit ashes to summon a dog that inflicts scarlet rot with its bites, but I figured it would only manage to apply scarlet rot once before dying to Rykard’s flying skull swarm attack. By crafting and using Rot Pots instead, I would have more flexibility in the spirits I could summon.
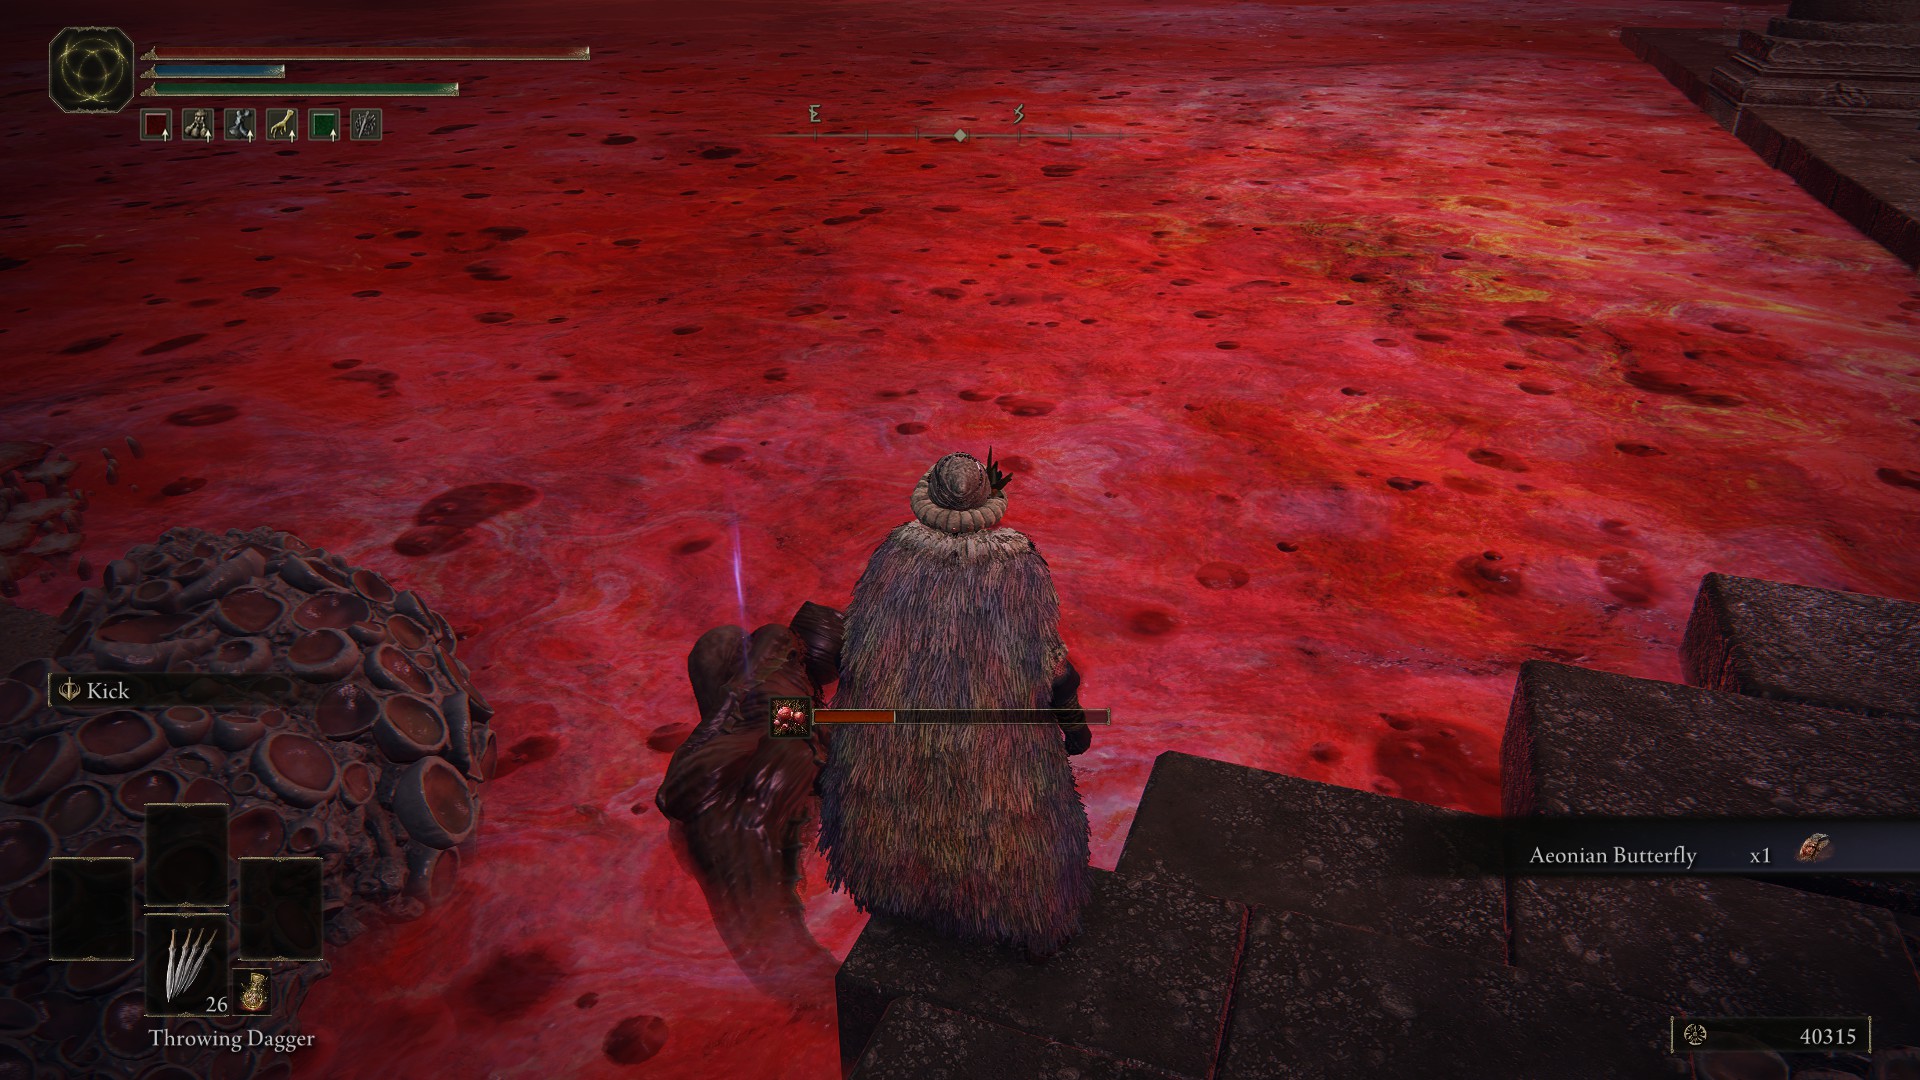
Rot Pots are a ritual pot item, meaning only 10 can be held at most, but it was in this moment that I came to a grave realization. Rot Pots require 2 Toxic Mushrooms, 2 Faded Erdleaf Flowers, and 1 Aeonian Butterfly to craft. Toxic Mushrooms and Faded Erdleaf Flowers were abundant throughout Caelid; I even defeated Commander O’Neil to have a site of grace right in the heart of Caelid, next to gathering nodes for both of these materials. It was the Aeonian Butterflies which were the hindrance. They are rare items that don’t respawn once gathered. There were plenty to pick in the Lake of Rot, and I found some around the Swamp of Aeonia in the middle of Caelid just by giving it a cursory once-over. I even purchased a handful from a merchant nearby, but all of this gathering left me with less than 50 Aeonian Butterflies.
Scarlet Rot is a powerful status effect because it does part of its damage based on a percentage of a target’s maximum HP. This was the perfect counter to enemies with inflated HP pools like Rykard and the upcoming Fire Giant. However, only having a limited guaranteed quantity of rot pots made them precious commodities. If I failed to kill a boss after having spent them, they’d be gone forever. Now, like with any rare resource in Elden Ring, it is possible to farm Aeonian Butterflies: in fact, the Lake of Rot is the best place to farm them, since the basilisk enemies here can drop them, and the lake is lousy with basilisks. The problem is that I only had a discovery of 109: this attribute governs the likelihood of enemies dropping items on death. It would be possible to boost this to 159 for three minutes with a Silver-Pickled Fowl Foot, but that would require more gathering for that recipe, and I wouldn’t be able to take full advantage of the item. The fastest method for me to farm basilisks as a chemist was to kill just the first three on a raised path near the north side of the lake, where you enter it, and then warping to the grace site nearby (remember that I have limited supplies each run, and would need to rest at the grace site to resupply).
I did a test to see how many basilisks I would need to kill in order to get an Aeonian Butterfly to drop with just 109 discovery: with the Gold Scarab they were giving me 733 runes per kill, which meant that if I killed a basilisk in 18 throwing daggers or less, I would gain more runes than lose. Most of the time they were dying in 8 or 9 daggers, so I was actually gaining more daggers this way. I killed fifty-five basilisks before the game deigned to give me one (1) Aeonian Butterfly, then on the fifty-sixth kill I got a second one. This took a long time and I exhausted 518 out of a possible 640 throwing daggers doing this test. I was able to buy all of them back and still have runes left over, but take heed: if you find yourself on a Chemist Run and need more butterflies for rot pots, use the Silver-Pickled Fowl Foot. Don’t make the same mistake I did.
Before facing off against Rykard, I decided to face the boss of the Lake of Rot: Astel, Naturalborn of the Void. I had one-shot it on my first playthrough, and I nearly did on my Chemist Run too, but its grab attack where it comes at you from off the screen got me at least twice. Ultimately, fan daggers proved to be highly effective against large bosses. Spending the runes on some more levels, and having full stocks of all throwing knife items, I felt sufficiently prepared. Feeling confident, it was time to face the Lord of Blasphemy once more. I crafted some lightning pots just in case I ran out of knives, centered my focus, and went about slaying the would-be god-eater.
I had faced off against the God-Devouring Serpent enough times to know its moveset. The one fatal attack it has is an earthquake attack where it ruptures the ground and sends a wave of rock at you. The only time I was able to dodge this was when the serpent messed up its targeting and misfired it in between target shifts: it primed the attack while targeting me, but then shifted to my spirit ashes, and the attack fired between us. If the attack hit me the wrong way, it could be an instant kill. The key to this stage was sticking close enough that it never did this attack, but far enough away that it never did the spinning “get away from me” attack either. It’s not surprising that my successful run never saw this earthquake attack once.
My main strategy involved whittling down the Serpent with Poisonbone Darts, Fan Daggers, Kukris, and Throwing Daggers, and using its attacks to clean up the debris littering the boss arena (which can kill you in either phase if you aren’t careful). These knives alone would be enough to take it down, allowing me to save Rot Pots for Rykard himself. But the Rot Pots themselves wouldn’t be enough, especially since all enemies build up resistances to status effects each time they’re applied. I’d only need to apply poison to the Serpent twice, but I’d exhaust my entire stock of Fan Daggers, and most of my Kukris. I needed something else; one more ace in the hole.
It was time for limit breaking. Ordinarily, a player can only carry 40 Throwing Daggers, 40 Fan Daggers, and 30 Kukris. However, players are able to leave items on the ground. This is distinct from discarding them: leaving actually drops the item on the ground, where they can be picked up by the player again or by another player; this is how it’s possible to trade items in Elden Ring from one player to another. Discarding an item, on the other hand, destroys it completely. The mist walls that block players from leaving a boss arena once entered have thin-enough collision detection that it’s possible to leave stacks of items on one side of the arena, pass through the mist, and then retrieve those items once on the outside.
Rykard required some additional preparation in this manner; it is fortunate that the small room just before his boss arena has a site of grace for this exact purpose. I would leave full stacks of Throwing Daggers, Kukris, and Fan Daggers on the outside of the boss arena, and then rest at the grace site. This would fully replenish my stocks of all three items from reserves, while keeping the dropped items on the ground. Then I’d enter the boss arena and fight the Serpent normally, free to expend as many knives as I needed. This added additional risk to the equation: Not only were precious rot pots on the line, but if I died, the dropped items would despawn, lost forever. This is why Rykard would be the most stressful boss to face on a Chemist Run: so many resources were on the line with each attempt.
I split my extra stash of knives into three separate groups: fan daggers on the left (relative to being inside the boss arena), kukris in the middle, and throwing daggers on the right. I could’ve stashed them all in one spot, but the doorway is wide enough to space them out for more accurate selection. There’s enough time after the Serpent dies to run to the mist wall and grab what you need, but a problem I foresaw was finding the entrance in a boss arena as massive as Rykard’s. Since the compass is turned off during boss fights, I used a blue map marker as a visual guide. Placing these on the map also places a blue beacon that stretches up into the sky, and if one is placed just south of the grace site next to Rykard’s boss arena, the blue beacon will shoot up through the roof of the small cave. The beacon is clearly visible against the colors of the boss arena, and it made knowing where to position myself and the boss once I got it down to less than a quarter of health remaining much easier.
Rykard himself is no joke, but I had gotten pretty far on previous attempts, only succumbing to simple mistakes or lack of knives. I wasn’t about to let victory slip away from me again. Summoning my Marionettes, they helped distract almost all the flying skulls during Rykard’s first big attack sequence. Rykard is slow enough that it’s easy to hit him with pots, and two rot pots are enough to get the first instance of scarlet rot going. After that, the fight isn’t too bad if you have enough practice with both phases. The Serpent attacks from phase one get reintroduced halfway through phase two, so having discipline with the dodge button is key. Rykard and the Serpent love to delay attacks for just a tick longer than you think, and once you get that rhythm down there’s not much that stands in the way. I only needed to apply scarlet rot twice throughout the fight, and when all was said and done, I was satisfied with my victory. No Serpent-Hunter needed: rot pots and knives were all it took.
It is a cruel joke, then, that this was all for naught, as completing Volcano Manor meant I would have to kill Patches to insure that his bell-bearing could be used to buy more fan daggers. He leaves for the Shaded Castle, but if you don’t kill him there, he disappears and so too do his wares. He’s the only source of purchasable fan daggers, so I had to kill him. Killing Rykard also didn’t fix Alexander’s questline like I hoped. I would never get that Jar, or that talisman from Jar-Bairn. More’s the pity, I suppose.
(Note: The Chemist Run was completed prior to patch 1.04 of Elden Ring, a.k.a. The Patches Patch. In 1.04, they added an additional step to Patches’ questline, which causes him to return as a merchant following his event in the Shaded Castle. Since my Chemist Run was exclusively done in 1.03, this was not an option at the time.)
—
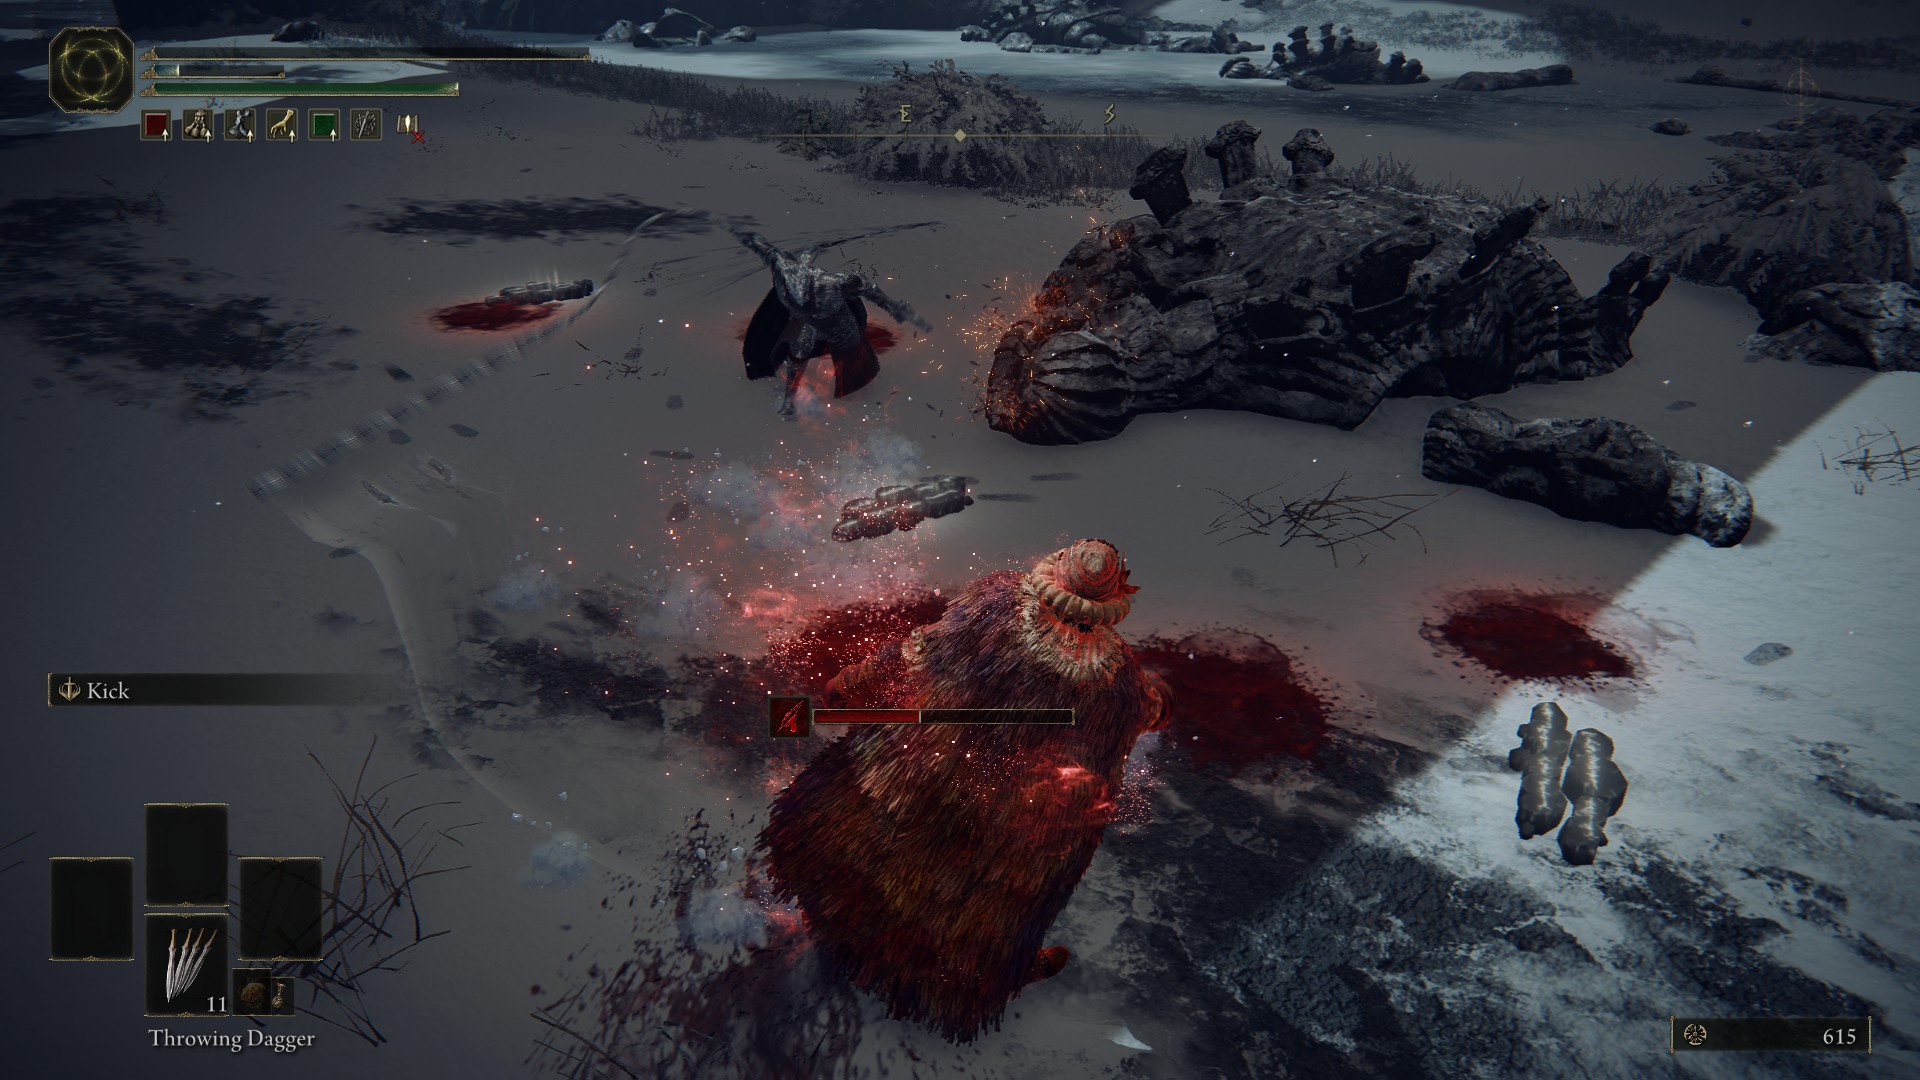
The journey through the Mountaintops of the Giants was quick and unceremonious, save for a quick stop in one of the catacombs so I could acquire the tenth and final ritual pot. This region is notorious for its sharp increase in enemy health and damage, and by the end of it, the enemies are so large and dangerous that I’ve never bothered to face them in combat, even when I had the luxury of weapons. There’s an NPC invader here, Bloody Finger Okina, who wields the dreaded Rivers of Blood katana, one of the most powerful weapons in the game. He gave me a few deaths, but then I decided to stand on the edge of a cliff and see if he’d fall to his death with me: sure enough, he did. I was even able to recover the runes gained from his death.
The Fire Giant is another enemy with an inflated health pool, and I nearly got him on my first try, but I couldn’t quite manage his phase two. I beat him in two tries on my first playthrough, so he was one of those bosses I never got to properly practice. I did hear about a cheese strategy where you’d lure him to a small cliff in his boss arena, and bait him into jumping off of it which would do enough damage to push him into his second form (where you would bait him again for the kill), but this was patched out in 1.03. Another strategy which did exist was jumping out of the boss arena with Torrent and then looping around to another cliff and fighting him at range from there. He can only hit you with his avalanche attack, and once you get him to half health the cutscene teleports you back inside the boss room (so if you want to cheese him more you’ll have to make that harrowing jump again).
I could make the jump relatively consistently, but a chemist-only problem presented itself, similar to the giant crow farm: none of the knives reached him, and the pots didn’t fare much better. The Wraith Calling Bell and the Regal Omen Bairn projectiles could reach him, but they couldn’t do nearly enough damage for the amount of FP I had, even if I converted all my healing flasks into FP-replenishing ones. I thought it was time to bust out some of the stone items I’d been neglecting up to this point. The magic stones will release magic projectiles when thrown, and those projectiles will home in on your target, but this had another problem: if I locked onto the giant, then the stones would crash against the cliff face, and the projectiles would collide with the edge before reaching the giant. If I didn’t lock on, the projectiles wouldn’t track to the giant because he was too far away. In the end, I concluded there was no way to cheese him out, and that I would simply have to learn the fight normally.
Rot Pots once again came in handy to deal with the giant’s massive health pool, and once again I reserved them for the last half of the fight. The key to this fight was staying between his legs for the first part, and staying beneath or behind him for the second part. Easier said than done given his proclivity for rolling away, but perseverance won out. I was quite impressed with my spacing on this fight for the most part. I’m not sure what it is, but I found it quite effortless to intuit the correct spacing needed to counteract the giant’s many attacks. I make mistakes to be sure, but I only got hit once in the last half of the fight. I’ll take it.
With the giant vanquished, I was free to stoke the embers in their kiln and set the Erdtree aflame, my chemist Vinny was whisked away to Crumbling Farum Azula, the last level before the finale of Elden Ring.
Crumbling Farum Azula is a winding, twisting, broken place with lots of verticality and paths looping back on themselves. It was also extremely uneventful. The beast enemies here can chase you for quite awhile, and their leaping lunge attacks can catch you in retreat if you aren’t careful, but I only died once running to the first boss, and that was only because I stopped to knife some beasts in the first place. Making it down to the first boss was simple, and by this point in the game I had everything I wanted item-wise, so it was just a matter of getting to the bosses and killing them. First on the chopping block were the Godskin Duo, a pair consisting of the Godskin Apostle and the Godskin Noble. These bosses are typically fought solo, with the Apostle requiring deft movements to avoid their attacks, and the Noble demanding adequate spacing to counteract their rolling attacks and huge piercing sword, and fighting them both required spacing each of them out and blocking one’s attacks with the other’s body.
I don’t have much to say about these two. It only took me two attempts which is one more than my first playthrough. I never had trouble with these guys in that playthrough, but I had heard they were giving people lots of guff, so I chalked it up to my dual greatsword build having an edge, but the chemist has another edge entirely. More than any fight, this one illustrates how effective running away can be against enemies in Elden Ring. Using the pillars to force whiffs was great, but I did end up wasting a bunch of knives which didn’t clear the pillars’ collision detection. These bosses are highly susceptible to the sleep status; if I had to fight them again, I’d probably focus on the big one since it’s easier to hit with fan daggers, and I wouldn’t summon imps so that the thin one would slumber for longer.
With the Godskin dweebs out of the picture, it was time for one more mad dash through to the final boss of Crumbling Farum Azula. I realize I make this area sound like it is very short, but when you’re running past every encounter like I am, you can go at a fairly brisk pace. There’s an optional NPC Invader fight with Recusant Bernahl (remember him?) which grants you the Blasphemous Claw tool item. This is similar to the Silver Pendant from Darks Souls 1’s Artorias of the Abyss DLC: it’s an item that negates certain boss attacks. The Blasphemous Claw has the bonus effect of working like a parry, and it can stun the next boss allowing for massive bursts of damage. Since I’m already using items extensively for all fights, I wanted to use this claw item, but I found it cluttered my inventory more than I could stand.
The Beast Clergyman is a character you can meet on the northeastern edge of Caelid, in the Bestial Sanctum. By giving him Deathroot to consume, which you mostly obtain by killing special bosses associated with Those Who Live In Death (read: skeletons, mostly), he’ll reward you with the bestial incantations I used on my first character, and when you give him the last one, he thanks you and disappears. If you do that, then he recognizes you once you face him here in Crumbling Farum Azula, where you must fight him to the death, but as I couldn’t use any of his rewards, I never bothered giving him Deathroot on my Chemist Run. As such, he didn’t recognize my chemist, and this just became a normal boss fight, where the Beast Clergyman uses those same incantations and slashes away with his Cinquedea knife. However, upon lowering his health enough, he reveals himself to be Maliketh, the Black Blade.
Maliketh is a black-armored beastman wielding a colossal greatsword imbued with the Rune of Death, giving it a special effect in the fight if you’re hit with certain attacks. His attacks are more striking, and he leaps across the battlefield slinging waves of light with his sword which propel him up into the air before he crashes down upon you. Maliketh brings to mind boss fights like Ludwig, the Holy Blade from Bloodborne and Sir Artorias from Dark Souls, and while I don’t think his fight is as narratively impactful as those two, as Maliketh is not as prominent a figure in the lore as Ludwig or Artorias were in their games, it is Maliketh’s fight that is my favorite boss fight among all the bosses of Elden Ring.
Most of my appreciation for Maliketh’s fight is owed in large part to how it felt like a Dante vs Vergil fight for my first character specifically (greatswords & bestial incantations, with some bloodflame for visual flair, even the vigor-heavy build had a nice contrast with this fight’s gimmick). On the Chemist Run, I’ll admit this kill was sloppy; not my finest work. Similar to the Godskin Duo, using the pillars in the arena for cover makes many attacks a non-issue, but that doesn’t stop me from nearly dying in the second half thanks to the unique gimmick of this boss fight, where Maliketh lowers your maximum HP and then also drains away your remaining HP over time. It’s one of the messiest kills I made on this run, second only to the Radahn kill.
Maliketh’s death marks the point of no return, where the Rune of Death is unbound and killing a god becomes possible. It is here that Leyndell transforms into the Capital of Ash, and the final sequence of boss fights occurs. There is no substantial level to run through, nor are there any particular enemies worth engaging (for a Chemist Run at least). I did go out of my way to get the Erdtree’s Favor +2 talisman, though this is obviously just for the HP and Stamina boost. It’s relatively easy to sneak past all the Ulcerated Tree Spirits, grab it, and warp out of there; not mandatory, but since I was already using the +1 version from defeating Mohg earlier in the sewers, I figured I might as well get the upgrade. The Capital of Ash is an appropriately barren area, lacking the layered, intricate level design Leyndell had before, as would be expected from an area located directly beneath a fully blazing Erdtree.

There are three boss fights remaining, and the first is Sir Gideon Ofnir, the All-Knowing. Sir Gideon is an NPC boss, and is tied with Juno Hoslow for worst NPC enemy in the game. Sir Gideon has a plethora of boss spells at his disposal, employing sorceries and incantations from throughout the Lands Between. Since I informed him about Mohg’s whereabouts on this playthrough, he incorporated one of Mohg’s blood incantations into his arsenal of spells. On my first playthrough, Sir Gideon was a complete push-over, but on my Chemist Run, when all of the NPC enemies had been troublesome at best and obscenely frustrating at worst, he was quite a formidable opponent. I think it took me about nine tries before I finally offed Ofnir. It got to the point where I was using Gravity Stone Fans, a stone item that emits waves of gravitational energy along the ground, to catch his rolls and interrupt his casting, but I eventually decided to summon the imps to bite his ankles while I knifed him from afar.
The footage truly captures just how ridiculous the roll-spamming gets with enemies like this: if you didn’t believe me after all this time that the NPC enemies were some of the worst to go up against as a chemist, hopefully now you understand how frustrating they can be. Beyond Sir Gideon Ofnir, the All-Rolling, lies the penultimate boss fight against Godfrey, the First Elden Lord. The golden spectral form fought earlier was just a taste of his boss fight, and he has more devastating area attacks this time around. He, like Maliketh and the Fire Giant before him, also gains a new moveset halfway through his health bar, returning to his old identity as Hoarah Loux, Warrior, Chieftain of the Badlands.
Something I didn’t know beforehand was that you can summon NPCs for this fight: Shabriri is available if you have inherited the Frenzied Flame, and newly added to patch 1.03 is the option to summon Nepheli Loux, Warrior, who is presumably related to Hoarah Loux, though I’m hesitant to dictate the manner of their relation.
I haven’t brought up any of the lore surrounding the characters or setting of Elden Ring, even though they are a large part of what makes these games appealing to many people, myself included. I noted my enjoyment of the “immersive atmosphere” these games provide earlier, and while I find great joy in considering various aspects of the characters and goings-on of places from Boletaria to the Lands Between, I find that quantifying all the bits and pieces of the backgrounds behind these games is unnecessary for my enjoyment.
In many respects, the disappearance of Queen Marika the Eternal described in the opening cutscene of Elden Ring is a lot like the discovery of Laura Palmer’s body in the opening minutes of Twin Peak’s first episode. Both women are unable to tell their parts of the story, and both are critical characters in their respective communities, with ties to various other characters in both works. Laura Palmer is more centrally focused on in Twin Peaks: the discovery of her body is the catalyst that drives the entire narrative forward. Meanwhile, Queen Marika is more of a background character who was instrumental in the establishment and cultural structuring of the Lands Between up to the point where Elden Ring begins. It’s not a one-to-one comparison, but the key feature they have in common is that the audience/player is left with questions and mysteries to ponder and turn around in their minds as the story progresses; questions and mysteries which may never be fully answered, because it’s the pondering that’s the entertaining part.
This is where Elden Ring’s position as a video game lends strength to this storytelling style: Players aren’t going to find every shred of evidence necessary to get the whole picture, and even if they uncover a huge clue, they may not make the important connections immediately. While writing this piece, I’ve been looking up many of the items I’ve talked about, and in so doing I made an enormous connection between one particular item and a certain weapon, which has intriguing ramifications on my understanding of the world of Elden Ring and its history. You will have to take my word for it that this happened, however, because I am reluctant to point out the exact connection I made, and what those items were, in much the same way that one might be reluctant to explain a puzzle solution to someone who hasn’t figured it out yet. The enjoyment comes from piecing things together oneself, but there’s also fascination to be had in not knowing every quantifiable detail in a work, and treating it like an organic account, rather than something as rigidly structured as a logic puzzle.
This brings me back to Nepheli Loux, and her aforementioned nebulous relationship with Hoarah Loux. It’s possible that they have a familial relationship—they have the same surname, but they also both introduce themselves as “Warrior,” and if we infer that Nepheli Loux is from the badlands like Hoarah Loux, there’s no guarantee that badlanders use surnames in the same capacity that, say, Diallos and his older brother Juno do. It’s possible that “Loux” itself isn’t actually a surname, but a title or a signifier of station. But maybe this is thinking too deeply about it: even if it’s just a surname and they are indeed related, there’d still be no way to know exactly how they are related. One might assume a father-daughter relationship, but it could also be a grandfather-granddaughter relationship, or an ancestor-descendant relationship. There’s no conclusive evidence one way or another, and that’s what makes it engaging in the first place.
“We are amidst strange beings, in a strange land. The flow of time itself is convoluted, with heroes centuries old phasing in and out. The very fabric wavers, and relations shift and obscure.” – Solaire of Astora, Dark Souls
Talk about warriors and Lynchian storytelling aside, Godfrey/Hoarah Loux is one of the best fights in the game, and being so close to the end and dreading the difficulty I’d have against the final boss, I elected to accept the help of both Shabriri and Nepheli Loux. Both of them can only be summoned under special conditions. I mentioned Shabriri’s before, but Nepheli Loux’s condition requires completing her questline. This was left unfinished at the game’s launch, but as of patch 1.03, one can indeed finish her questline and summon her for this fight.
I hadn’t caught a break against bosses on this run since General Radahn. I’m discounting the Mimic Tear fight I described earlier, because it wasn’t much of a challenge to begin with, like several bosses in mini dungeons I haven’t even mentioned, such as the Crystalians who you think would be a problem for a chemist given their high armor, but who ultimately fell rather quickly. If the game was going to reward my efforts by giving me access to two NPC summons for the penultimate boss fight, then I was going to take it.
I never got grappled by Hoarah Loux on my first fight with him, so getting to see the animations play firsthand was quite the spectacle for me. It’s easy to understand why this fight is a favorite for many. While Nepheli Loux, Shabriri, my two Marionettes, and myself made rather quick work of Godfrey, I decided to go full overkill and throw rot pots at him. My research told me that the final boss of Elden Ring is immune to all status effects, and I still had some rot pots on hand. I might as well use them and then convert those ritual pots into more effective bombs for that fight. Godfrey’s fight felt a bit anticlimactic for how quickly the five of us trounced him, but I already had defeated Praetor Rykard with items: I doubted that anything less than the final boss would feel as satisfying as that kill, and I would be right.
The Seventh Knife
One of the core facets of the Chemist Run as I outlined in the beginning, was that items were the only methods I could use to deal damage to enemies and bosses. I could not wield weapons, even if I was simply holding them to use their ashes of war. I could not wield magic spells either, as that too went against the whole point of the run. Only items could be used, however Elden Ring introduced a new set of items: spirit ashes. Since the beginning, I had left the use of spirit ashes up to player discretion. If a chemist wanted to use spirit ashes, they would be allowed to do so in their run, since the spirit ashes would have to be obtained in the first place, and the materials to upgrade them would have to be gathered. This added challenge and gameplay to the Chemist Run, in a manner similar to collecting the ritual pots or the cookbooks, and I believed that a “no spirit ashes” rule would further restrict an already-restrictive playstyle to the breaking point of enjoyment.
As I’ve demonstrated, I was able to face a fair amount of bosses in Elden Ring without using spirit ashes at all. It could be argued both that the spirit ashes I elected to use weren’t the best ones I could’ve been using, and that I didn’t need them that much in the first place. I summoned the Marionettes for the Rykard fight, but they barely did meaningful damage to him, and their value was better felt in the first fiery skull phase, where they distracted most of the skulls’ attention. However, a second fiery skull phase occurred during my fight with him, and I demonstrated the ability to successfully survive that sequence — the Marionettes weren’t required to defeat Rykard.
Of the spirit ashes that I elected to use throughout the run, three of them were constructs, or artificial creations: the Fanged Imps, the Marionettes, and the Soldjars of Fortune, though the latter were only in one of the major fights. I did also purchase the Jarwight Puppet from Seluvis, a character involved in Ranni’s questline: This puppet wears my coveted Jar helmet, and throws pot items which seemed appropriate for this challenge run, as he uses items in the same manner that I do. Unfortunately, the Jarwight Puppet is best against lumbering, slow bosses that are easy to hit and don’t move around too much. Watching him try to lob pots at the Fire Giant was pitiable, and after that fight, nearly all of the bosses would be a bad match-up for the Jarwight Puppet. I shudder to imagine him trying to hit Maliketh or Gideon.
When I look back on the Chemist Run, and all of the items I deployed to reach the end of Elden Ring, there was one constant element in my arsenal. There was one shining, glimmering item archetype that proved to be the most effective, most versatile, and most plentiful. The Cracked and Ritual Pot items were valuable, but limited in their application due to their slow animation; the same could be said of the stone items like the Gravity and Magic stones. The Perfume items were powerful and potent, but limited by the resources required to craft them, and the range of their effectiveness. The tools like the Regal Omen Bairn were extremely important for specific situations, such as rune farming on the giant crow, but they lacked speed and damage. There was just one singular item archetype that had all of the utility, damage, speed, and efficiency to outclass all others.
Knives.
Throwing Daggers were cheap, powerful, and fast; Kukris were devastating and made up for their sluggishness; Fan Daggers were absurdly strong against large targets, racking up ridiculous amounts of damage, with staggering potential too; Poisonbone Darts allowed for continuous damage even during periods of retreat or evasion; Crystal Darts offered a cost-efficient avenue for damage, while also providing an elemental offense option, and making dungeon crawling more tactically dynamic; and Bone Darts were an ever-present backup supply in the event that any of the other five knife types ran dry. Throwing knives have long been a tactical option since Demon’s Souls, and they were one of my favorite items to deploy in Bloodborne, and here they were in Elden Ring carrying me all the way from Margit to the final boss. It would be during this final boss, however, where their strength would be, in a manner of speaking, hard-countered.
The final boss of Elden Ring is split into two different fights, similar to Rykard but with the two fights being against completely different bosses. Up first is Radagon of the Golden Order. You know a boss means business when they fucking RP walk toward you like they don’t give a shit. Radagon has powerful holy hammer attacks and can take out chunks of health with a single strike. He also shatters the ground with delayed holy explosions, and hurls lightning spears that impact the ground and explode shortly thereafter. He’s a tough fight, more than worthy as a final boss, but unbeknownst to me my first time around, Radagon has a hard counter to my Chemist Run: he can deflect thrown items, massively reducing their damage.
One of my Poisonbone Darts would deal 24 damage to him—when deflected they dealt 2. That’s at least a 90% damage reduction on items he deflects; Poisonbone Darts deal most of their damage with their poison effect, but this would apply to every item. I even found that he can deflect the Spark Aromatic while it explodes. Much like the NPC enemies spamming the dodge roll, Radagon can deflect as many projectiles as he wants, and while he can only do this from his neutral stance (i.e. not during the wind-up, execution, or cooldown animations of an attack), boss neutral stances have been some of the best times to get damage in against bosses up to this point. It’s an especially effective counter for a boss like Radagon to have, whose neutral stance is a slow walk toward the player. The only other boss I’ve noticed with the ability to neutralize items have been the storm currents on Godrick’s charge-up animation, and Rennala’s casting of her Full Moon spell (the Moon blocks the items from hitting her). Every other boss just dodges the item once thrown, or gets hit with it: a simple dichotomy of damage application or avoidance that is easy to understand.
If Radagon had this deflection ability as the only twist in his boss fight, then it wouldn’t have been cause for concern, but there was another issue: he’s just the first of two bosses. Once defeated, the actual final boss of Elden Ring takes stage: the Elden Beast, an enormous, otherworldly sauropod-like creature. The Beast has humanoid arms, and it fashions the body of the now-slain Radagon into a massive sword, which it uses to launch devastating holy slashes, in addition to all manner of celestial cloud attacks, and a large-scale incantation that seemingly traces the Elden Ring itself in the sky before it encircles and annihilates you with holy damage.
Mercifully, the Elden Beast cannot deflect items like Radagon, and its large lumbering form makes it quite effortless to get hits on it, but it has some truly devastating attacks, and a penchant for flying and swimming around the arena in a way that makes catching up to it a constant struggle throughout the fight. Not to mention the fact that both of these bosses must be felled in the same run—if you die during the Elden Beast fight, then you have to fight Radagon all over again. Due to the nature of the boss arena, it’s also not possible to pull the same trick that I used with Rykard: There’s no opportunity to drop extra supplies outside the boss room and resupply between fights. When you enter the boss room, located within the Erdtree itself, you are teleported inside, with no access to the mist wall or any items you may have left behind it.
It’s one thing to throw a knife or pot and miss completely because the enemy moved in a particular way that the knife flew over their shoulder, or the pot arced over their head. It’s another thing entirely to hit an enemy dead-on with the item, and have most of that item’s damage be negated. Combining this with the fact that the double boss fight wouldn’t have a resupply option, I was simply at a loss for words. Not even rot pots would save me this time, since the Elden Beast is immune to scarlet rot. I could poison Radagon, but his resistance to poison was so high that it’d take several darts just to apply it once, and after that, I wouldn’t have enough darts to apply it a second time. My options for applying damage were limited for both fights, and one of them could reduce my damage by at least 90% per item.
Here I was, as the Erdtree burned above, at the twilight hour of the Chemist Run, and the final bosses were pulling out all the stops to bring the whole thing crashing down around me. No punches pulled; no quarter given. If that’s how they wanted to play…
So be it.

During my earlier attempts against the Fire Giant, after deciding that the cheese strategy was out of the question, but before trying my hand at fighting him in earnest, I put together a contingency plan. A plan to be enacted in the unlikely, but possible, event that a late-game boss would simply be too much for a chemist to surmount. I wasn’t sure at the time if this plan would be necessary, but I had been initially intended to use it on the Fire Giant himself. Fortunately, I was able to best him without its use. Radagon, and the Elden Beast, would not be so lucky.
Prior to facing off against Praetor Rykard, I had explored the Lake of Rot to acquire the cookbook for crafting Rot Pots. The boss of that area was Astel, Naturalborn of the Void. I had fought it on a whim, just to see if I could do it as a chemist, and it only took me a few tries to best it. Beyond Astel’s boss arena, however, was an elevator that lead up to a sequestered plateau in southern Liurnia. It was here that a special evergaol could be found: the Ringleader’s Evergaol. Evergaols are small arenas with what are essentially mini-boss fights, and the Ringleader’s Evergaol housed Alecto, Black Knife Ringleader.
As her title indicates, she is the leader of the Black Knives, the faction responsible for several high-profile murders in the Lands Between. Black Knife enemies are strewn all over the game, and in a similar vein to NPC enemies, they are impressively agile and quick to dodge projectiles. Fortunately for me, Alecto suffers from a particular AI exploit due to the placement of her evergaol on the edge of the plateau. By luring her to a specific point in her arena, Alecto will get wedged between the edge and a small ledge beside it. She will then try to walk back into the arena, but you can bodyblock her with your own character, and attack her with impunity. I wouldn’t have resorted to doing this if not for the fact that I had already done a similar thing for Juno Hoslow, and that she was incredibly good at dodging my knives as you might expect.
Defeating Alecto awards one with the spirit ashes of Black Knife Tiche, Alecto’s daughter who perished defending her mother. Black Knife Tiche is one of the most powerful spirit ashes in Elden Ring: She’s quick, agile, good at dodging enemy attacks, and her signature skill involves using her black knife to cast Blade of Death, which has the same properties as those found in some of Maliketh’s attacks: getting hit by Blade of Death will debuff a target, temporarily reducing their maximum HP and draining their HP away for a short time. With my low Mind attribute, I didn’t actually have enough FP to summon Tiche, so I modified my Flask of Wondrous Physick to negate FP costs for a short time before summoning her. I loaded up on Boiled Crab, a powerful item to boost physical defense, from Blackguard Big Boggart, and entered the Erdtree.
Tiche would be the seventh knife in my arsenal: the Godkilling Knife.
—

I don’t normally do challenge runs in video games, but the sheer novelty of an item-only Chemist Run of Elden Ring felt equal parts challenging and intrinsically rewarding. There are probably those out there who could do a run like this without any spirit ashes, or without any NPC summons, or without either, and I applaud those who manage that feat. As for me, I don’t have any regrets over my accomplishment: I did this Chemist Run for myself and I don’t care if others find it less impressive. They probably had to use Serpent-Hunter to kill Rykard.
So that’s the Chemist Run for you. If you’re interested in doing one yourself, I’d love to hear your thoughts and updates on your progress. Overall, I’d say the run was a success and it had some interesting challenges to overcome, but I also would never recommend that anyone play Elden Ring this way, unless it really, really strikes their fancy. I would like to give a special shoutout to two content creators whose work inspired my own Chemist Run: ymfah and The Backlogs, whose incredible challenge runs of several Souls games are worth checking out. Their videos kept me going in times of struggle with this run.
Stay safe out there Tarnished, and may the guidance of grace lead you to many Boiled Crabs.
Hmmm.. how did you have enough runes to buy enough items to kill the bell bearing hunter so quickly…